Veeam released Veeam Backup for Microsoft Azure 1.0 on April 28, 2020, Veeam Backup for Microsoft Azure is a solution developed for protection and disaster recovery tasks for Microsoft Azure environments. With Veeam Backup for Microsoft Azure, you can create image-level backups of Microsoft Azure VMs and keep them in Microsoft Azure storage accounts for high availability, cost-effective and long-term storage. In addition to image-level backups, you can protect your data by creating and maintaining a chain of cloud-native snapshots of Microsoft Azure VMs.
Today, I am going to show you how to install it.
Create Azure Storage Account
1.Sign in Azure portal.
2.In Search resources, service, and docs (G+/), type storage accounts.
3.Select Storage accounts from the Services.

4.On the Storage accounts page, click +Add.

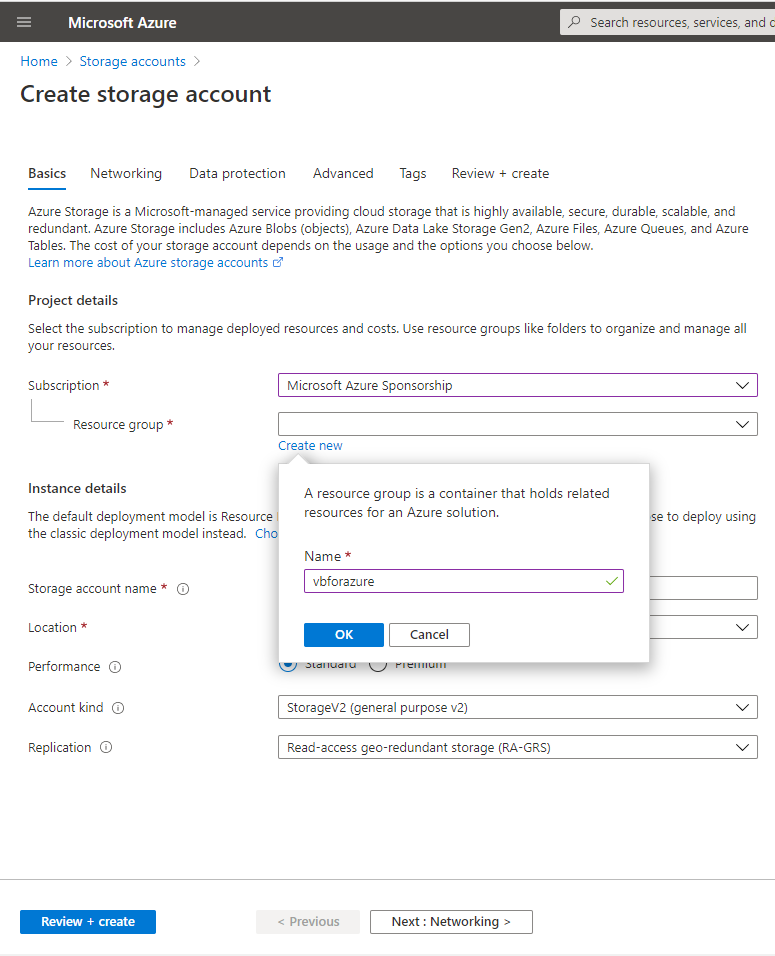
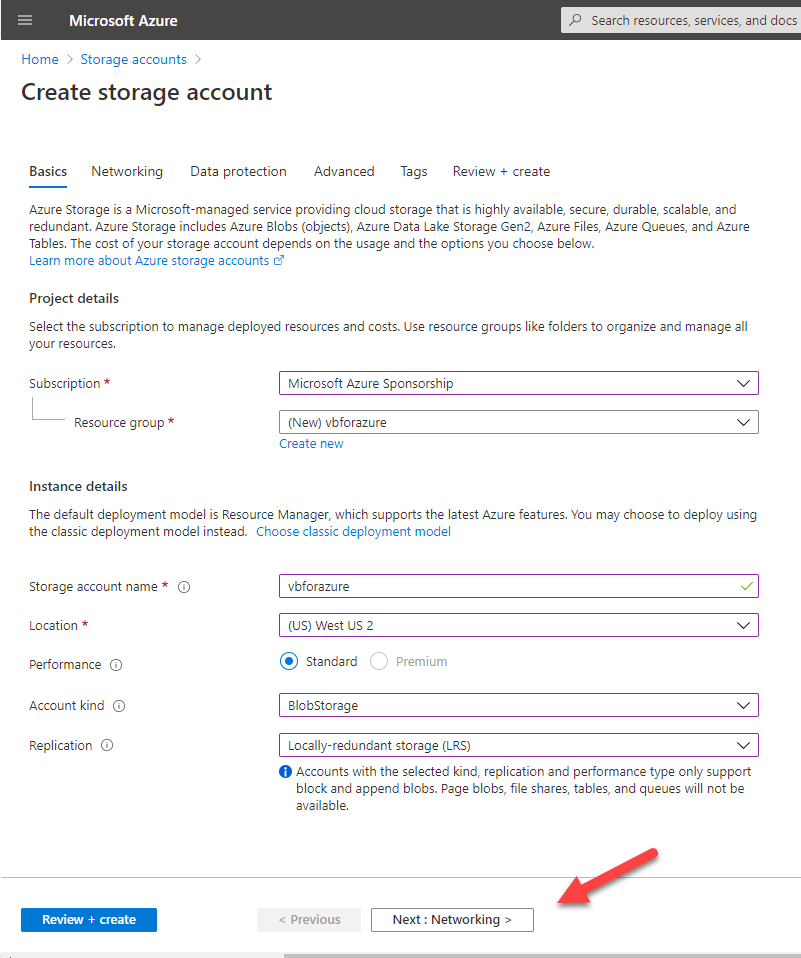
5.On the Basics tab, configure Project details and Instance details storage account settings, click Next: Networking.
Project details
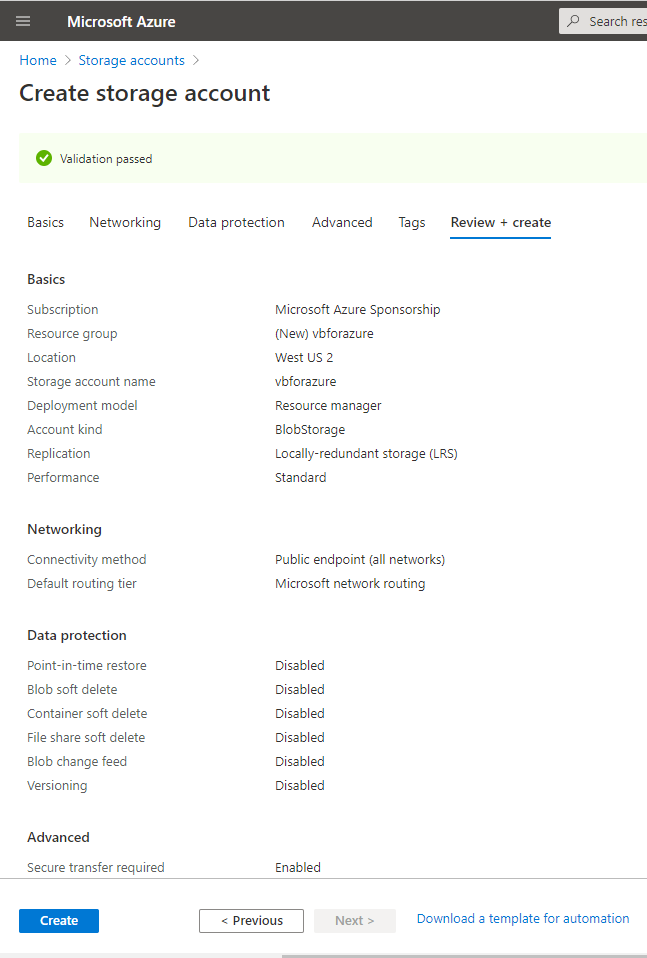
- Subscription: Select your azure subscription, in my case is Microsoft Azure Sponsorship.
- Resource group: Click Create new, type vbforazure in the Name field, click OK.
Instance details
- Storage account name: Type vbforazure.
- Location: Select (US) West US 2.
- Performance: Select Standard.
- Account kind: Select BlobStorage.
- Replication: Select Locally-redundant storage (LRS).
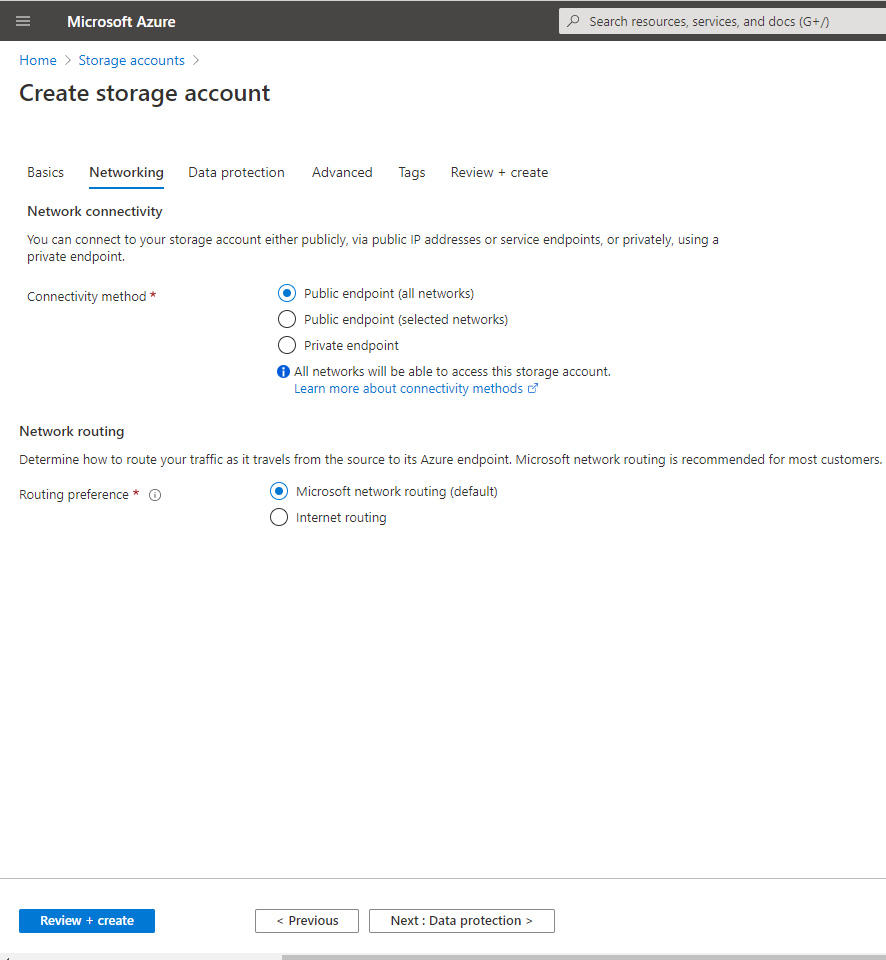
6.On the Networking tab, configure Network connectivity and Network routing settings, click Next : Data protection.
Network connectivity
- Connectivity method: In my case, keep the default settings, select Public endpoint.
Network routing
- Routing preference: In my case, keep the default settings, select Microsoft network routing.
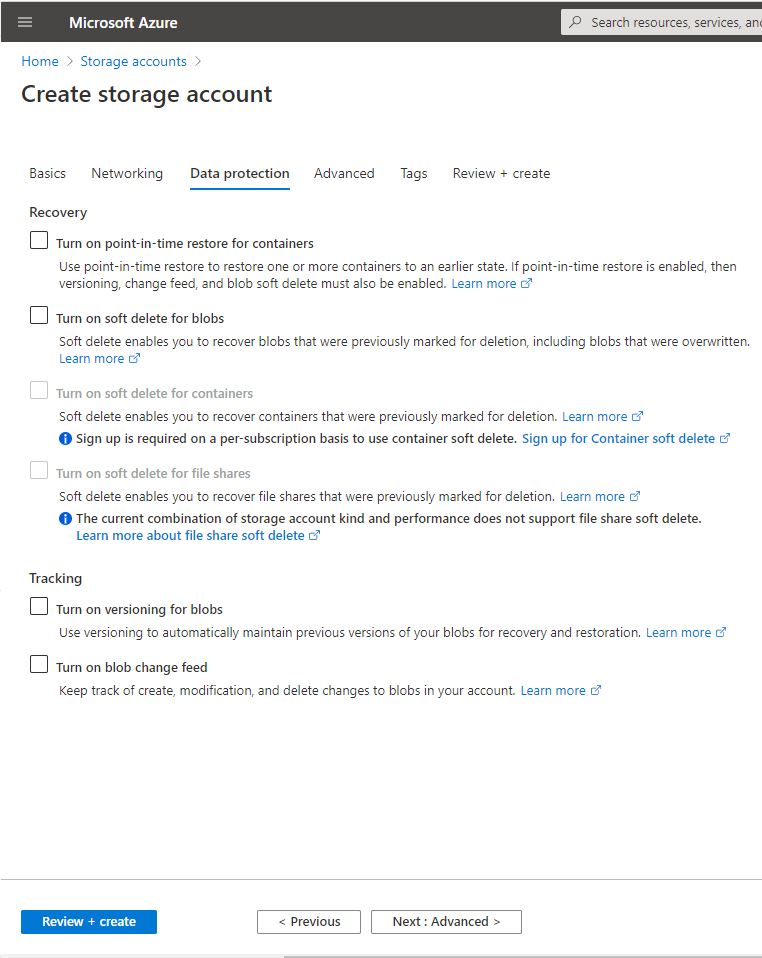
7.On the Data protection tab, keep the default settings, click Next : Advanced.
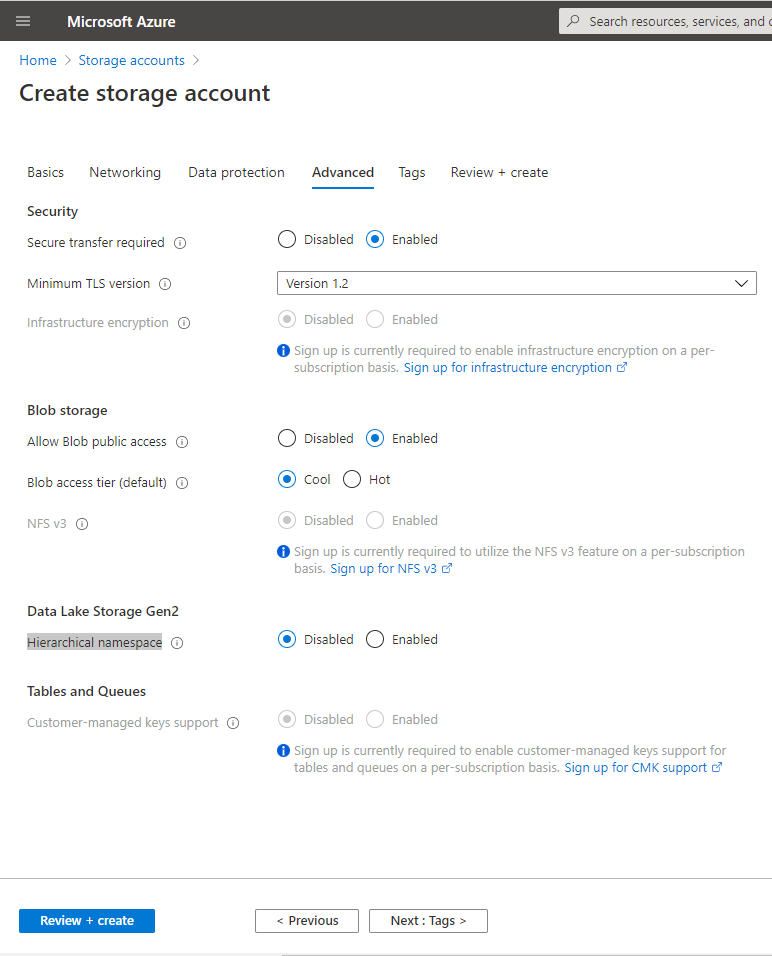
8.On the Advanced tab, configure Security, Blob storage and Data Lake Storage Gen2 settings, click Next : Tags.
Security
- Secure transfer required: Select Enable.
- Minimum TLS version: Select Version 1.2.
Blob storage
- Allow Blob public access: Select Enable.
- Blob access tier: Select Cool.
Data Lake Storage Gen2
- Hierarchical namespace: Select Disable.
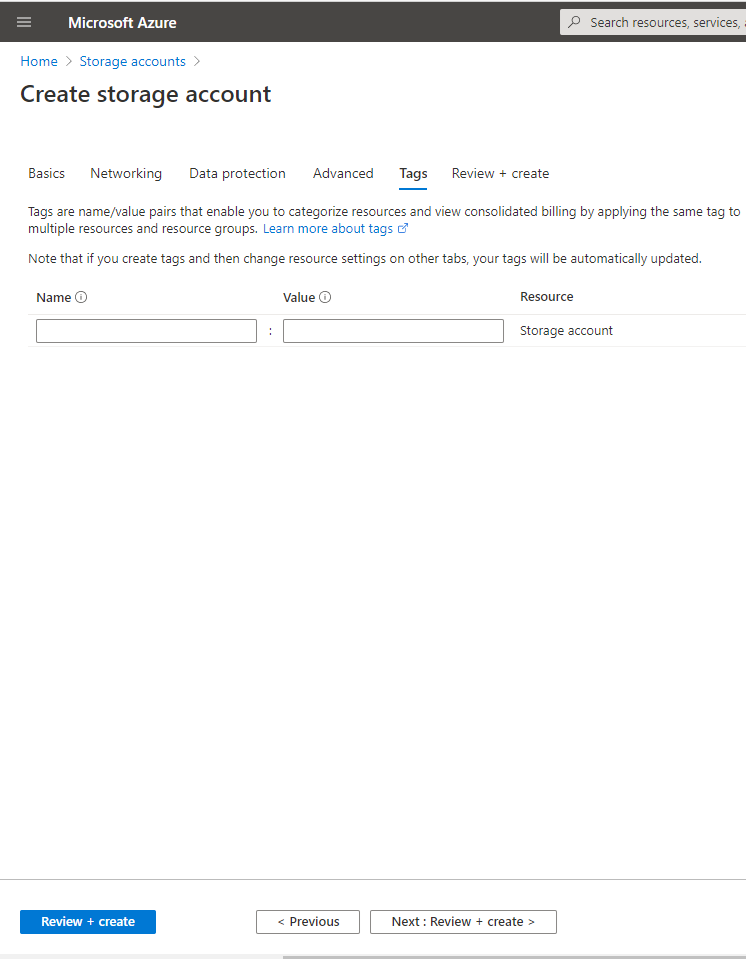
9.On the Tags tab, keep the default settings, click Next : Review + create.
10.On the Review + create tab, verify settings and make sure Validation passed, click Create.
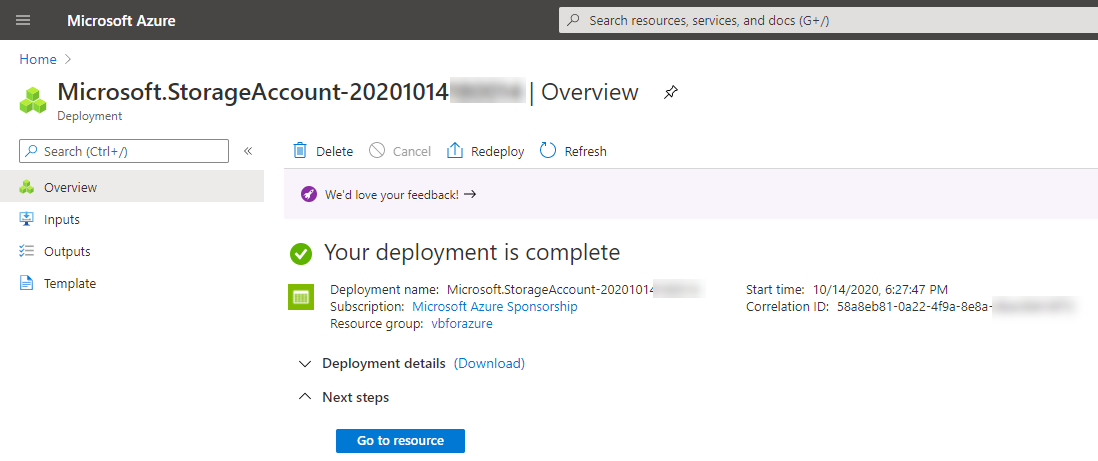
11.on the new Microsoft Storage Account overview page, click Go to resource.
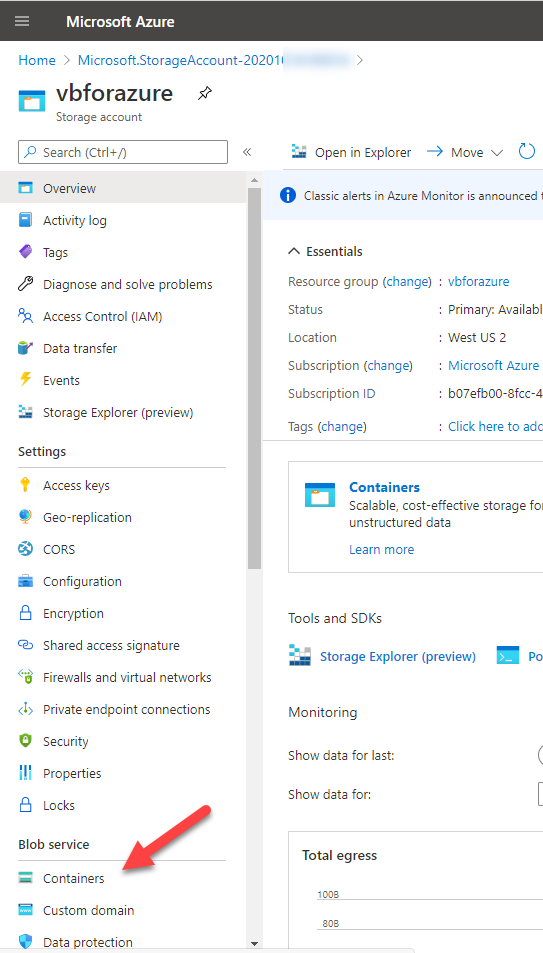
12.On the new storage account page, select Containers.
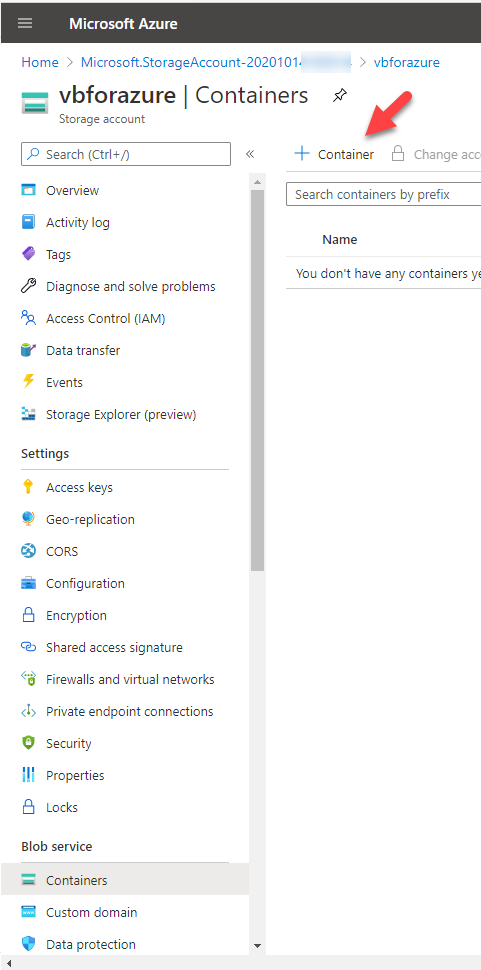
13.On the Containers page, click +Container.
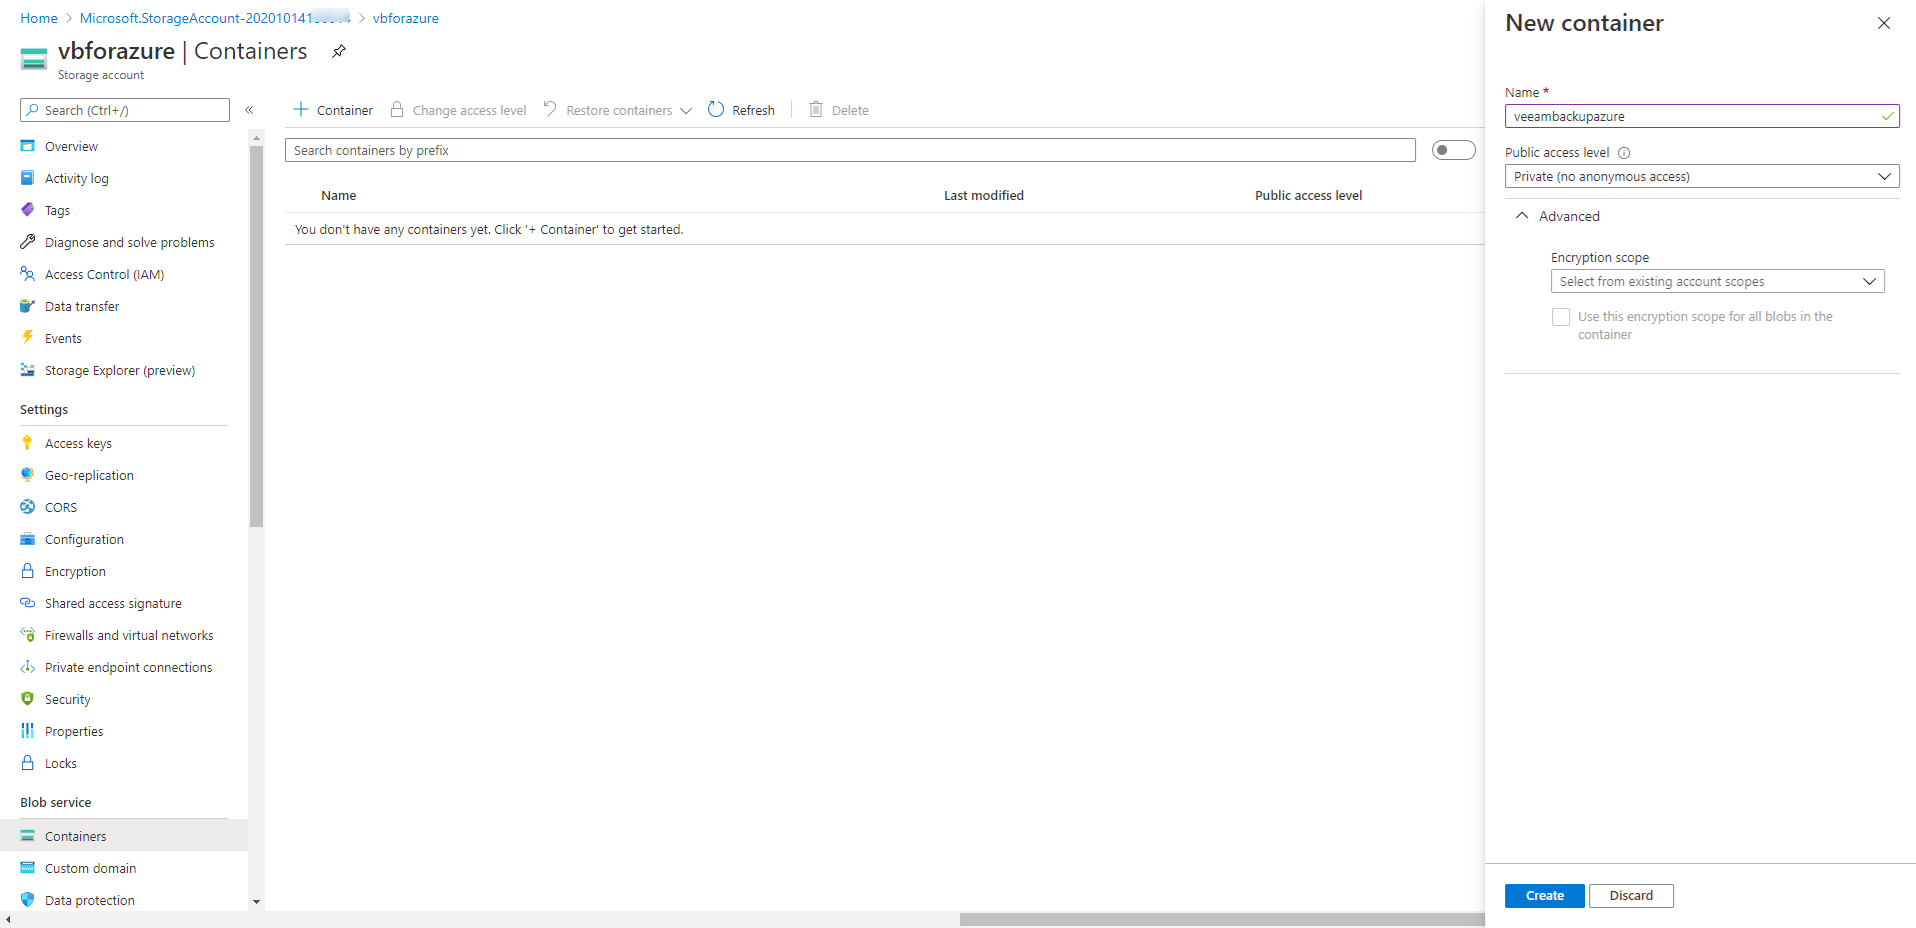
14.On the new container page, configure container settings, click Create.
- Name: Type veeambackupazure.
- Public access level: Select Private.
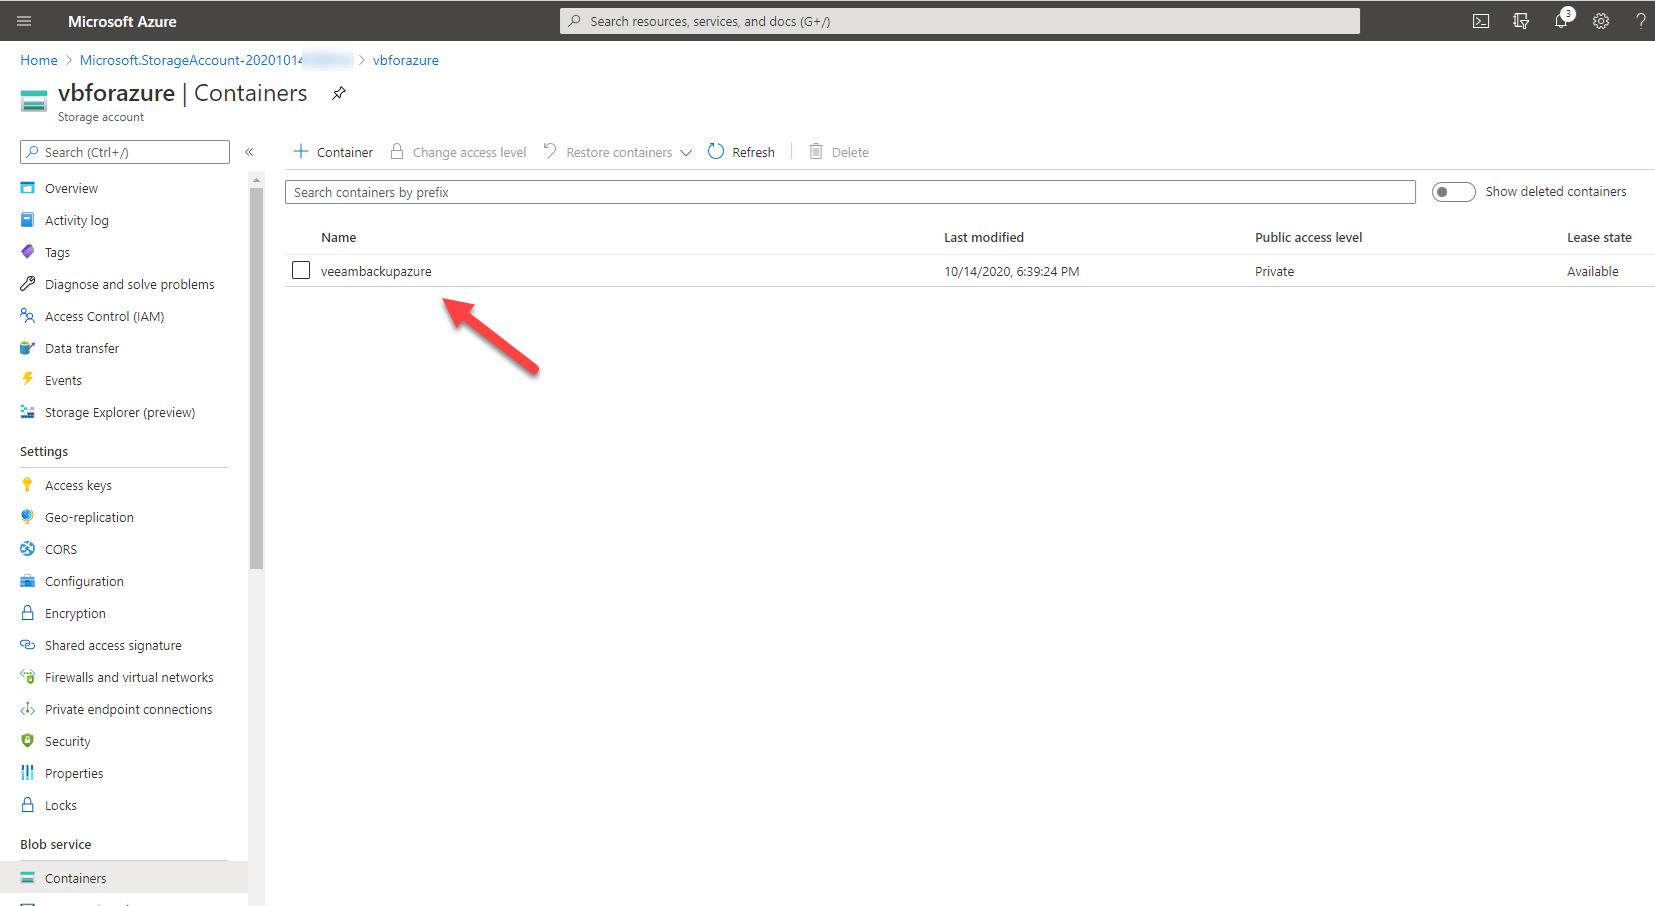
15.Verify the new container is ready.
Install Veeam Backup for Microsoft Azure
1.Sign in to Azure portal.
2.In Search resources, service, and docs (G+/), type Veeam backup for Microsoft azure.
3.Select Veeam Backup for Microsoft Azure Free Edition from the Marketplace.

4.On the Veeam Backup for Microsoft Azure Free Edition, click Create.
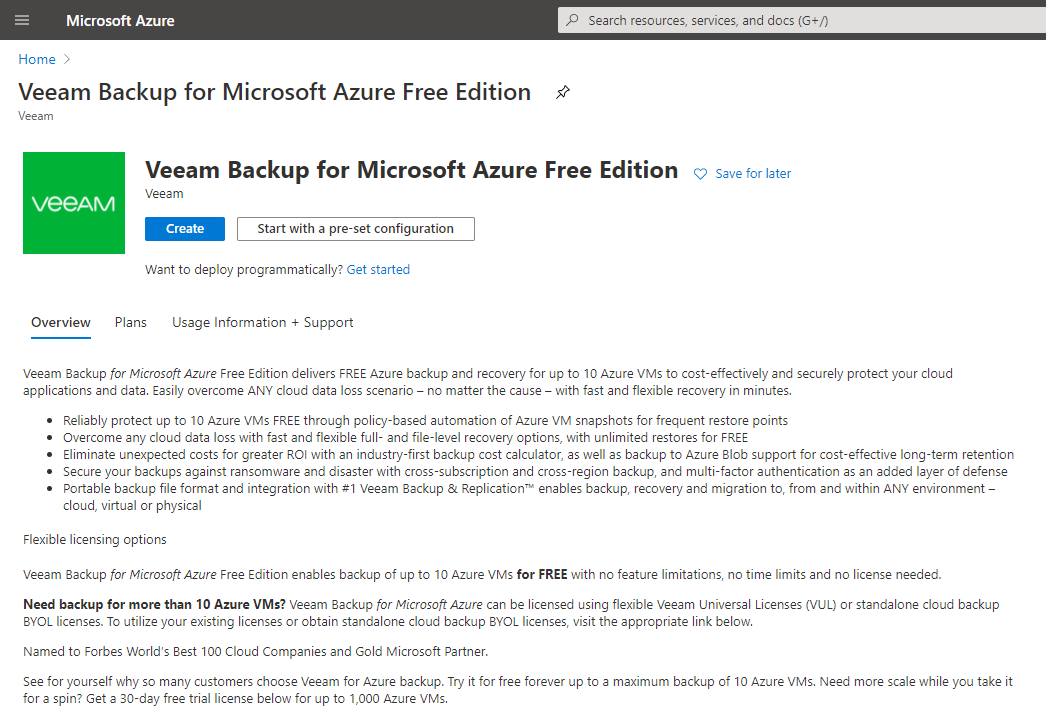
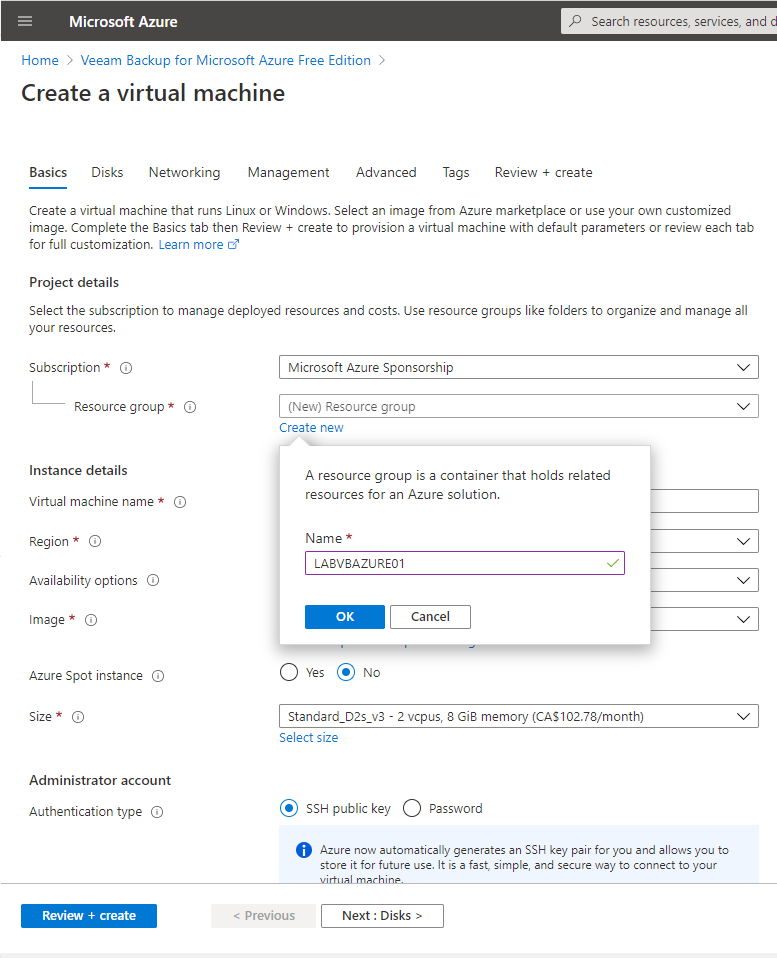
5.On the Basics tab, configure Project details, Instance details and Administrator account settings for virtual machine, click Next: Disks.
Project details
- Subscription: Select your azure subscription, in my case is Microsoft Azure Sponsorship.
- Resource group: Select Create new, type LABVBAZURE01 in the name field, click OK.
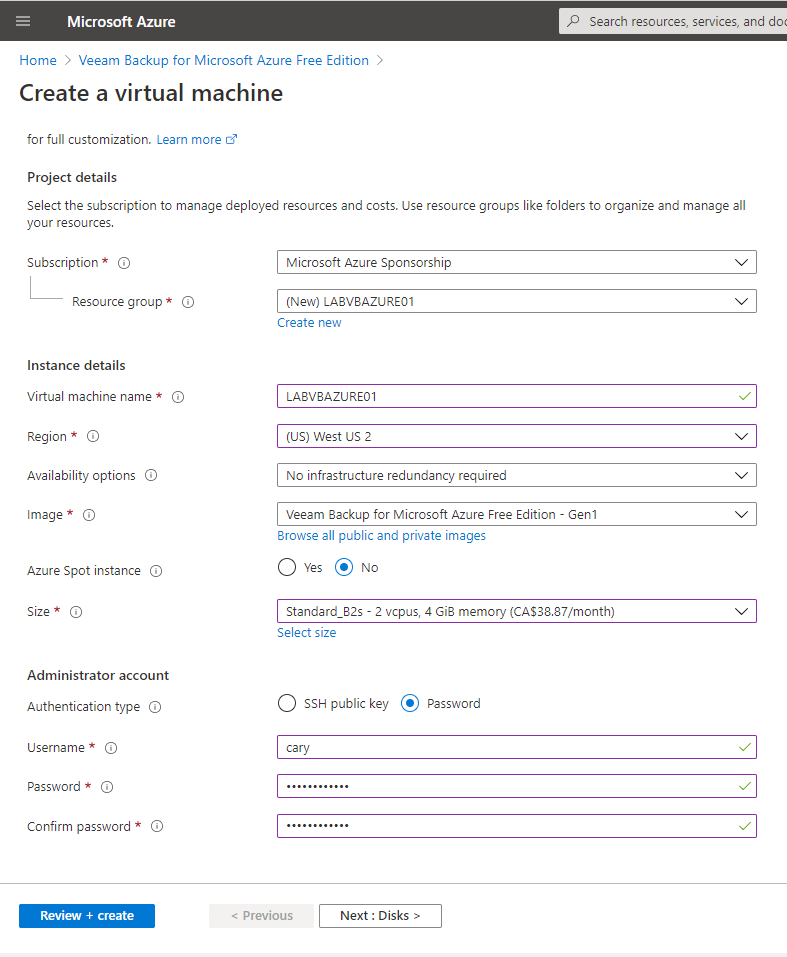
Instance details
- Virtual machine name: Type LABVBAZURE01.
- Region: Select (US) West US2.
- Availability options: Select No infrastructure redundancy required.
- Image: Select Veeam Backup for Microsoft Azure Free Edition – Gen1.
- Azure Spot instance: Select No.
- Size: Select Standard_B2s-2vcpu,3Gib memory.
Administrator account
- Authentication type: Select Password.
- Username: Type your username
- Password: Type your password.
- Confirm password: Type your password again.
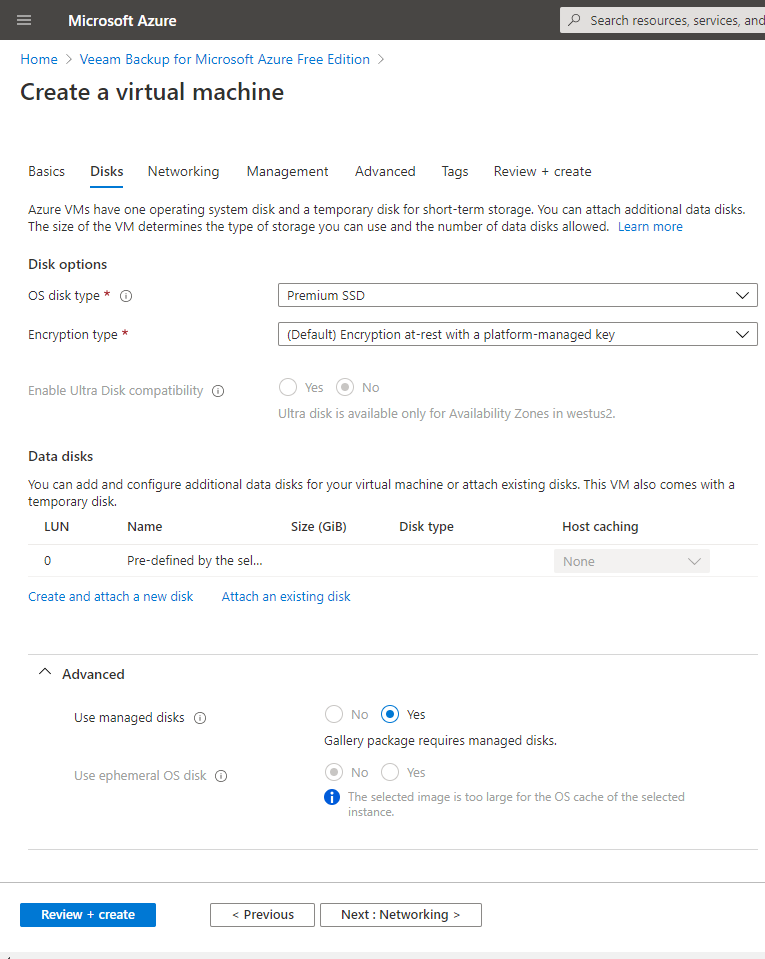
6.On the Disks tab, configure Disk options and Data disks settings for Disks, click Next: Networking.
Disk Options
- OS disk type: Select Premium SSD.
- Encryption type: Select (Default) Encryption at-rest with a platform-managed key.
Data Disks
We don’t need any data disk for this machine.
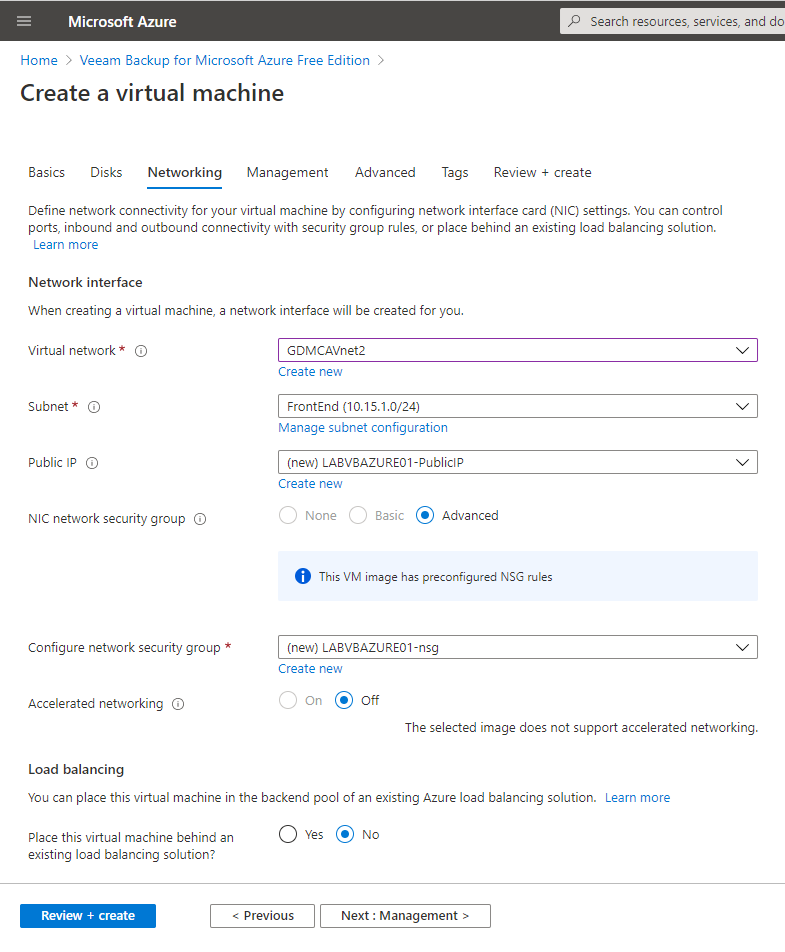
7.On the Networking tab, configure Network interface and Load balancing settings for Networking, click Next: Management.
- Virtual Network: Select the existing Vnet, in my case is GDMCAVnet2.
(if you don’t know how to create Azure Virtual Network, please check my previously post https://newcarysun-dacvdccdesfnhnfh.canadacentral-01.azurewebsites.net/configuring-cisco-meraki-to-azure-site-to-site-vpn-tunnels-ikev2-azure-cisco-meraki/)
- Subnet: Select the existing Subnet, in my case is FrontEnd.
- Public IP: select Create new, type LABVBAZURE01-PublicIP, select Basic SKU, select Dynamic Assignment, click OK.
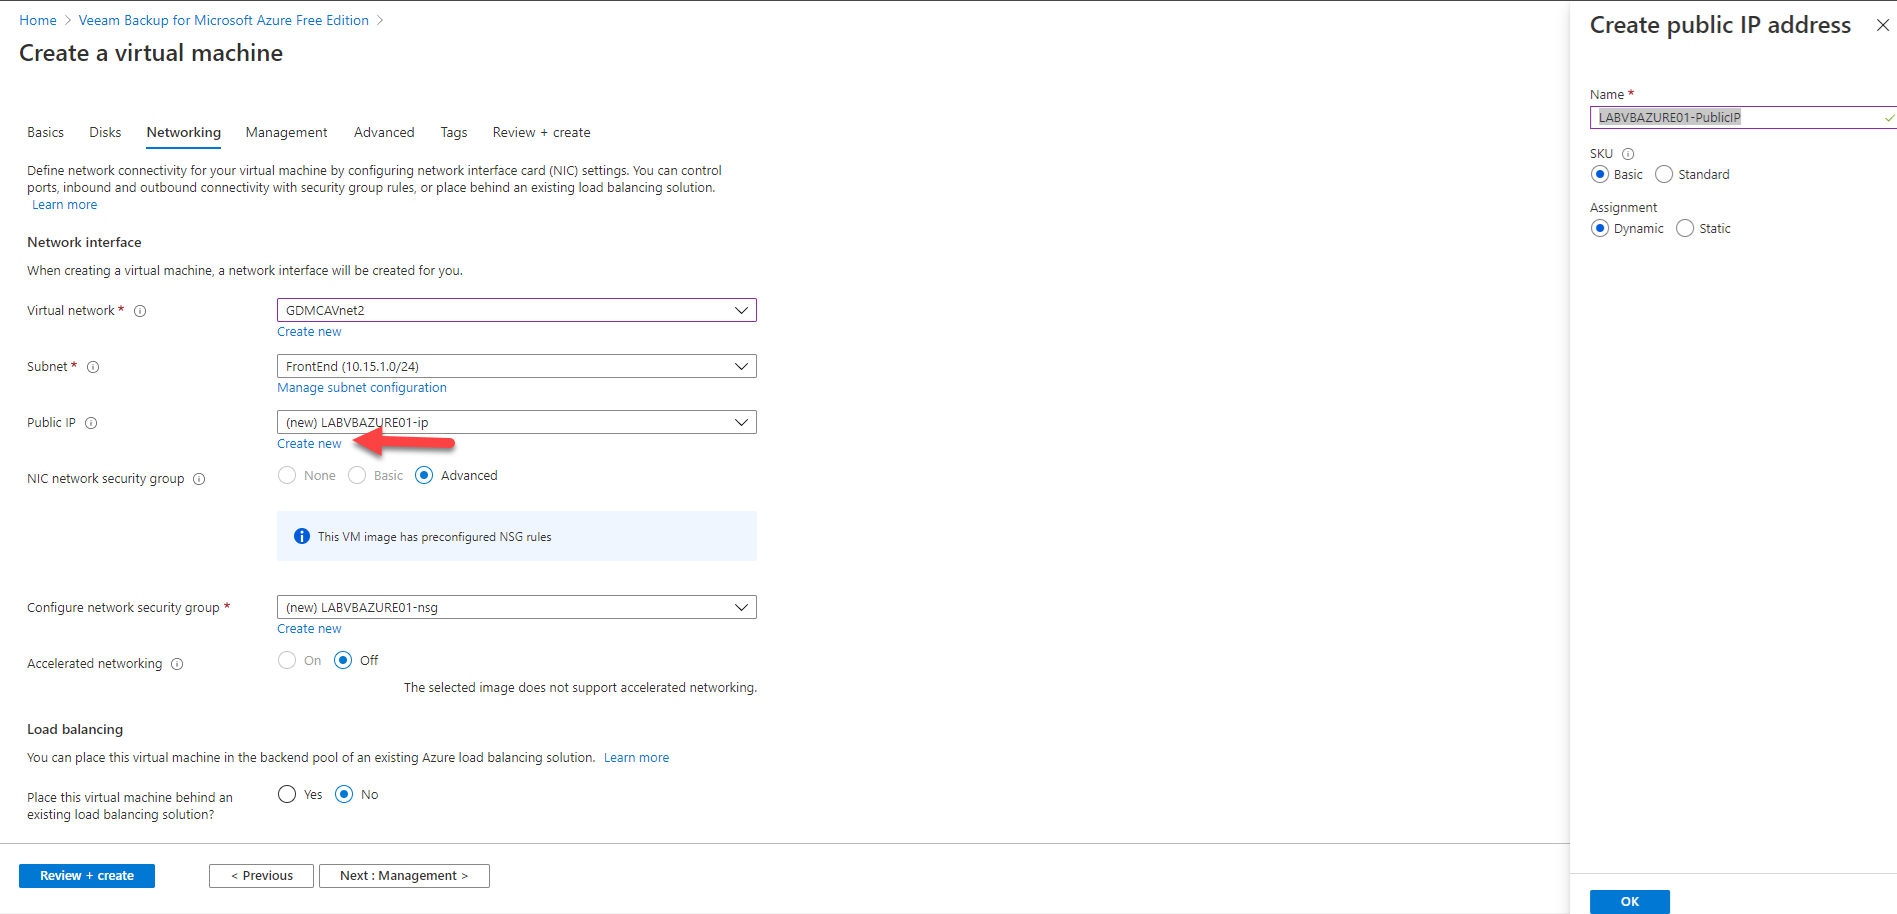
- NIC network security group: Select Advanced.
- Configure network security group: keep the default setting.
- Accelerated networking: Select off.
Load balancing
- Place this virtual machine behind an existing load balancing solution?: Select No.
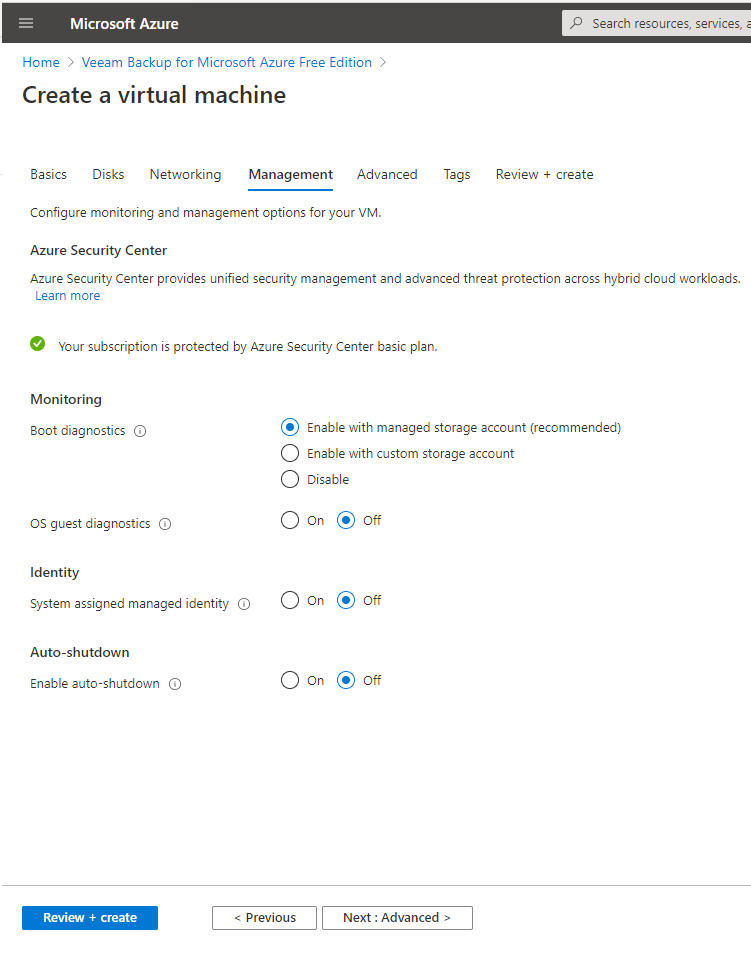
8.On the Management tab, keep the default settings, click Next: Advanced.
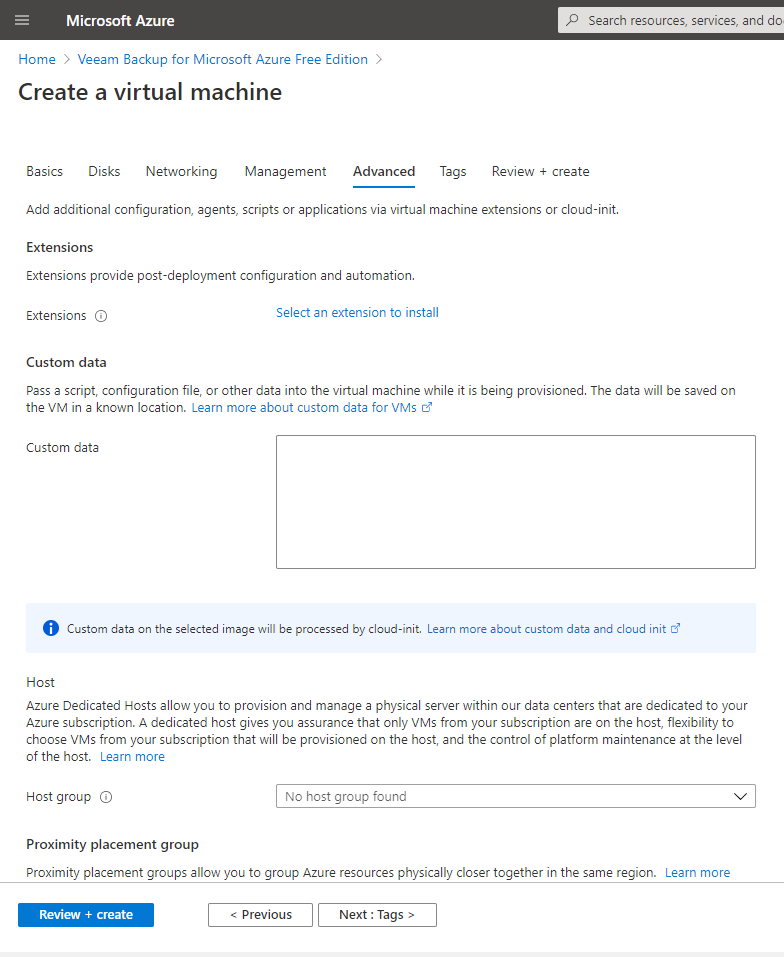
9.On the Advanced tab, keep the default settings, click Next: Tags.
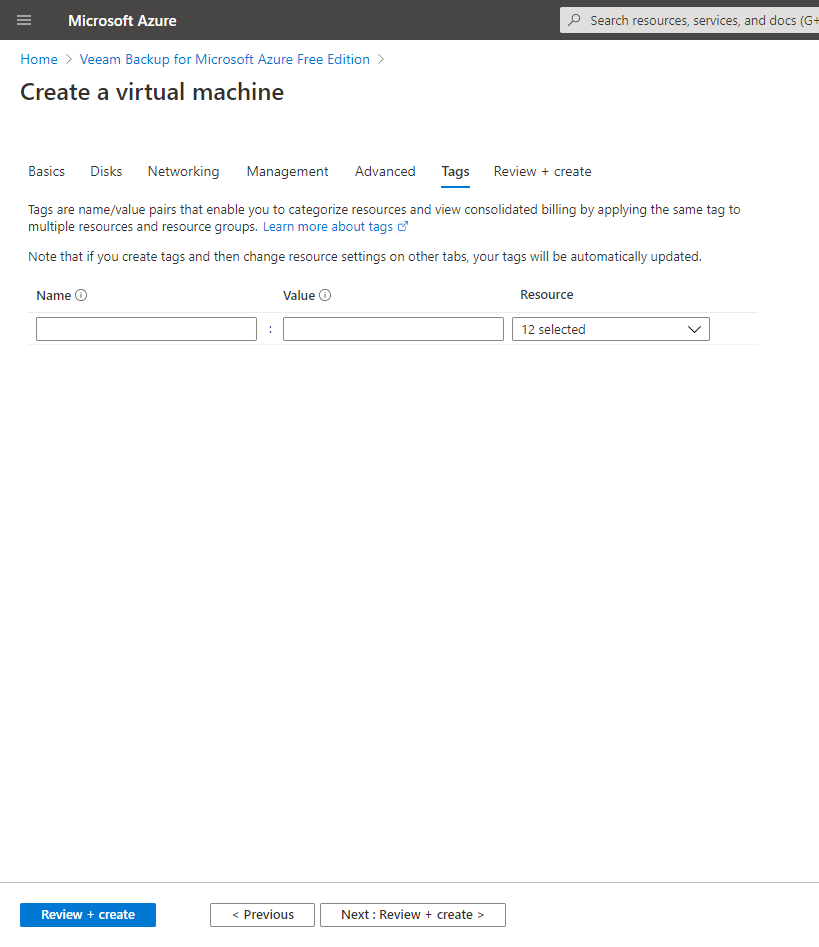
10.On the Tags tab, keep the default settings, click Next: Review + create.
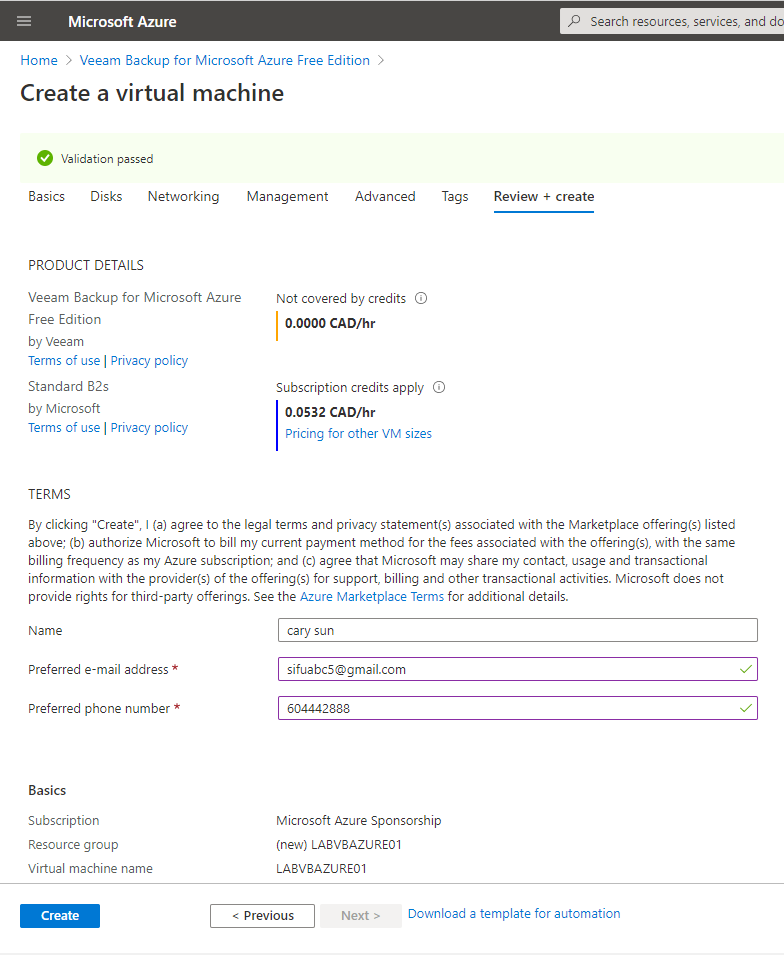
11.On the Review + create, you need to field in Preferred Email and Preferred phone number, click Create.
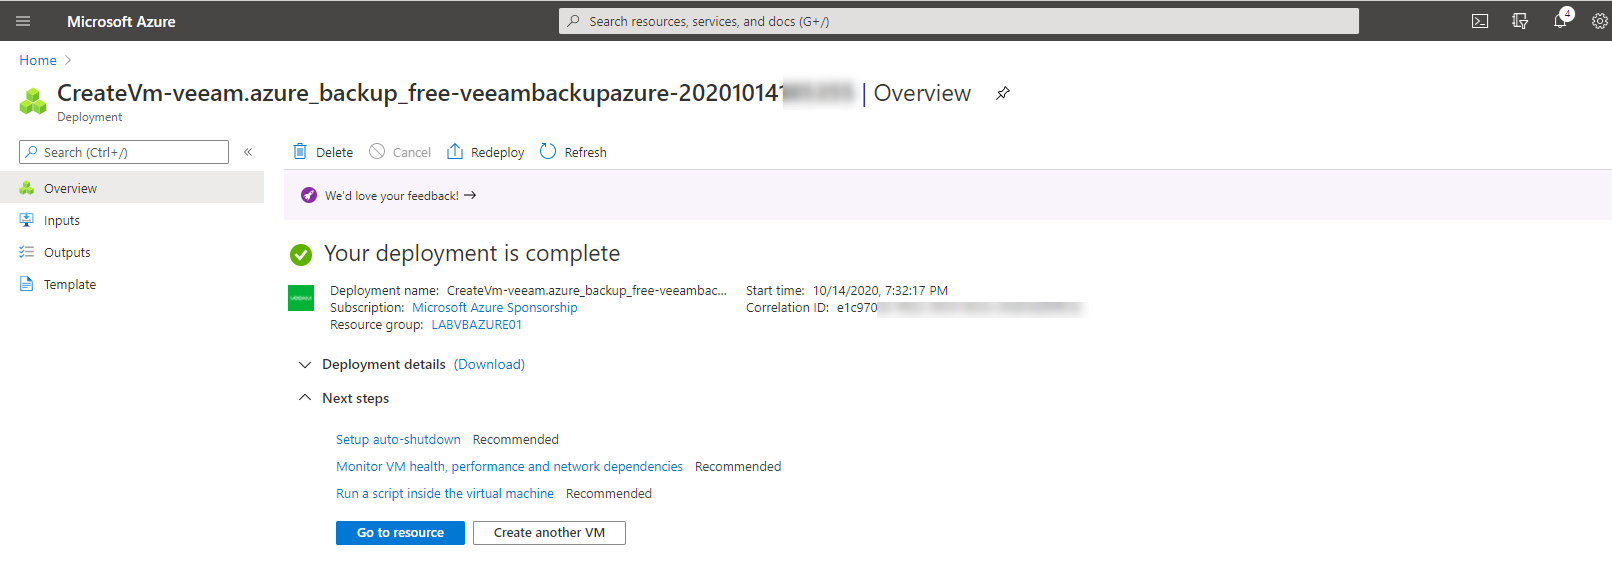
12.Verify your deployment is complete, click Go to resource.
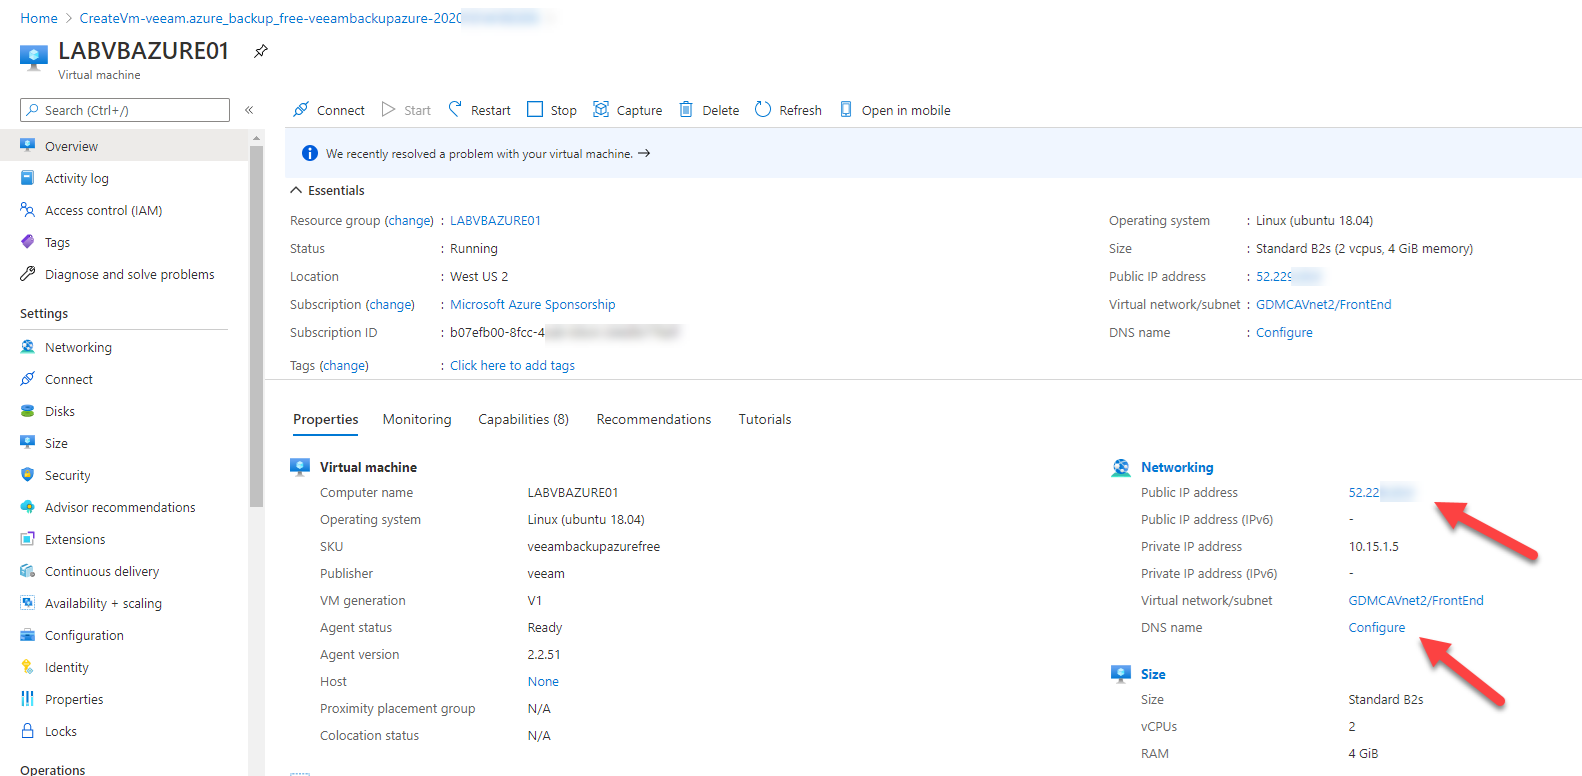
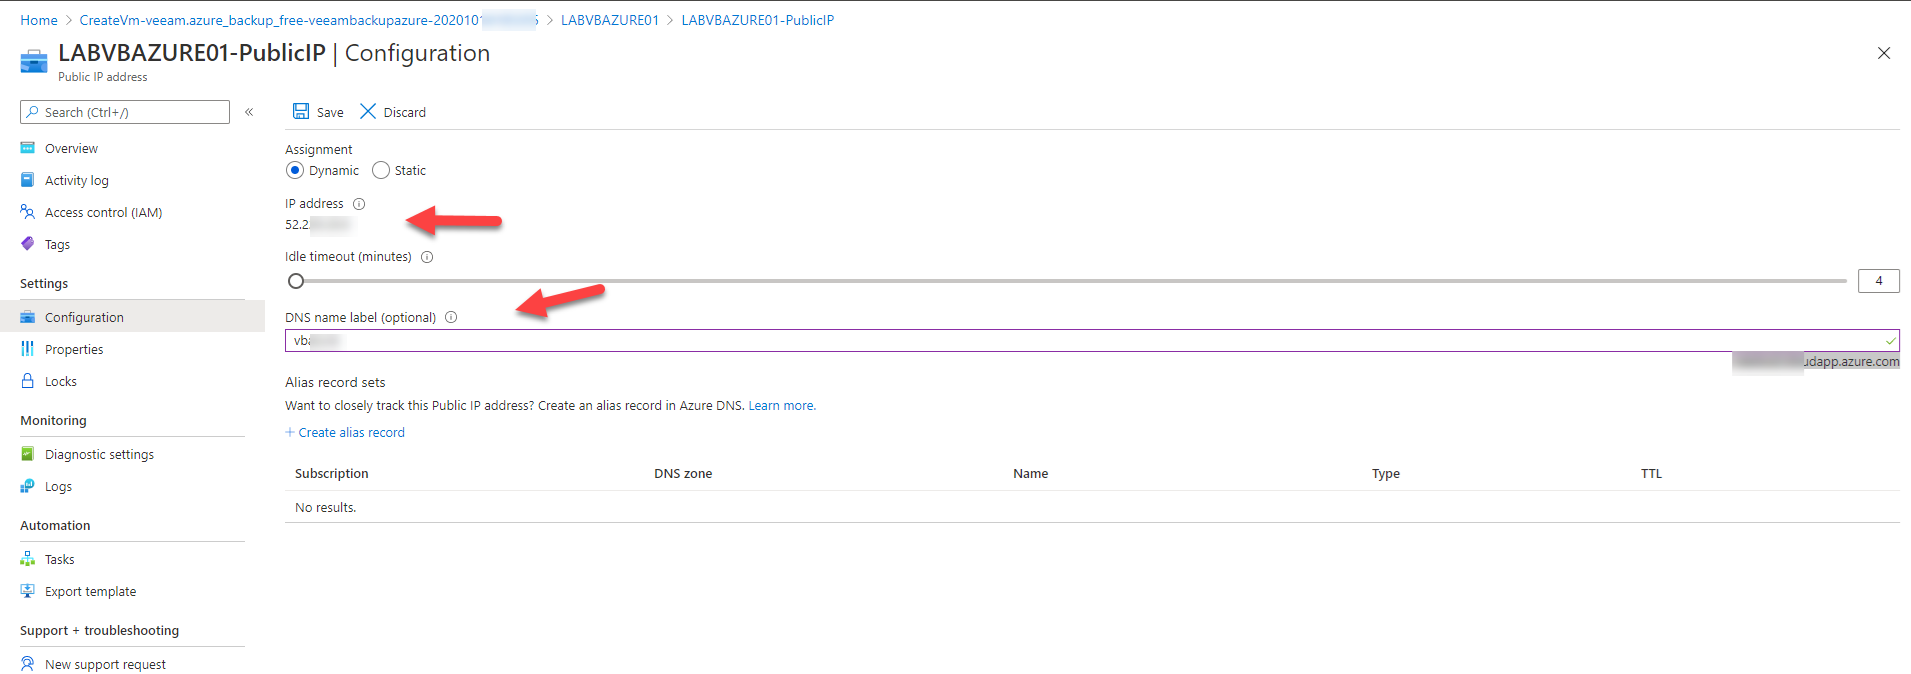
13.On the new Virtual Machine page, take note for its public IP address, click Configure at DNS name.
14.On the virtual machine PublicIP configuration page, type vbazure in DNS name label, click Save. You will be able to access the Veeam backup for Microsoft Azure via public IP address or public DNS hostname, in my case is vbazure.westus2.cloudapp.azure.com.
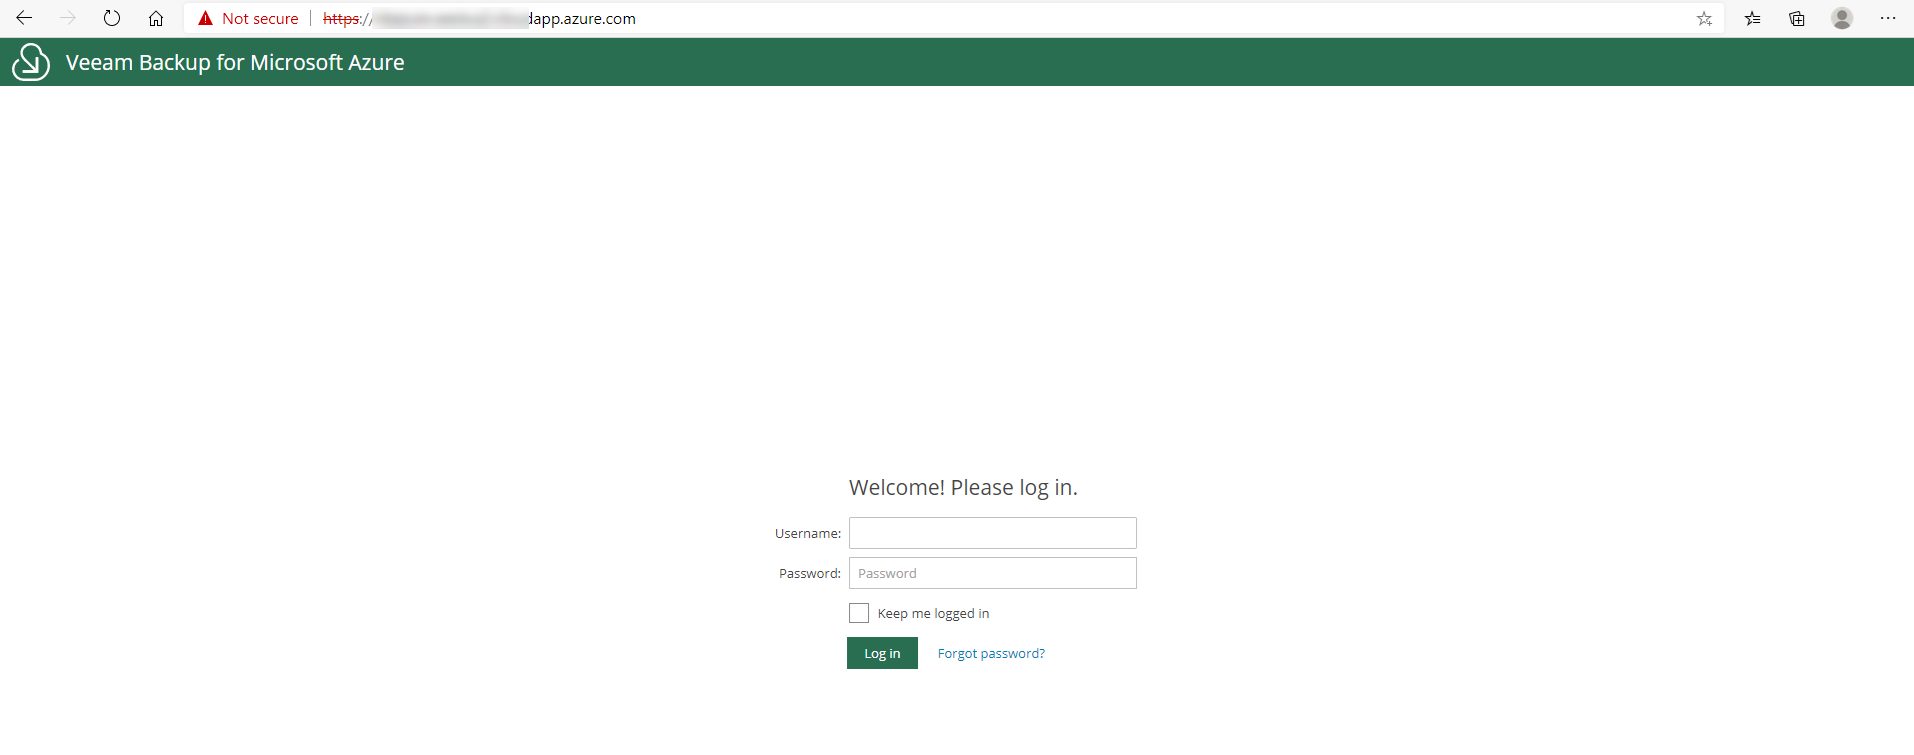
15.Open web browser, type https://public IP address of virtual machine or https://public DNS hostname to access Veeam Backup for Microsoft Azure.
Hope you enjoy this post.
Cary Sun
Twitter: @SifuSun
Web Site: carysun.com
Blog Site: checkyourlogs.net
Blog Site: gooddealmart.com
