Citrix ADC is deployed in front of web, application and database servers. It combines high-speed L4-7 load balancing and content switching with application acceleration, data compression, static and dynamic content caching, SSL acceleration, network optimization, application performance monitoring application visibility and robust application security via an application firewall.
Today, I am going to show you how to configure Citrix ADC with Virtual Apps.
1.Type the IP address of Citrix ADC in a Web browser to access the virtual appliance.
2.On the Configuration, expand the Citrix Gateway menu.
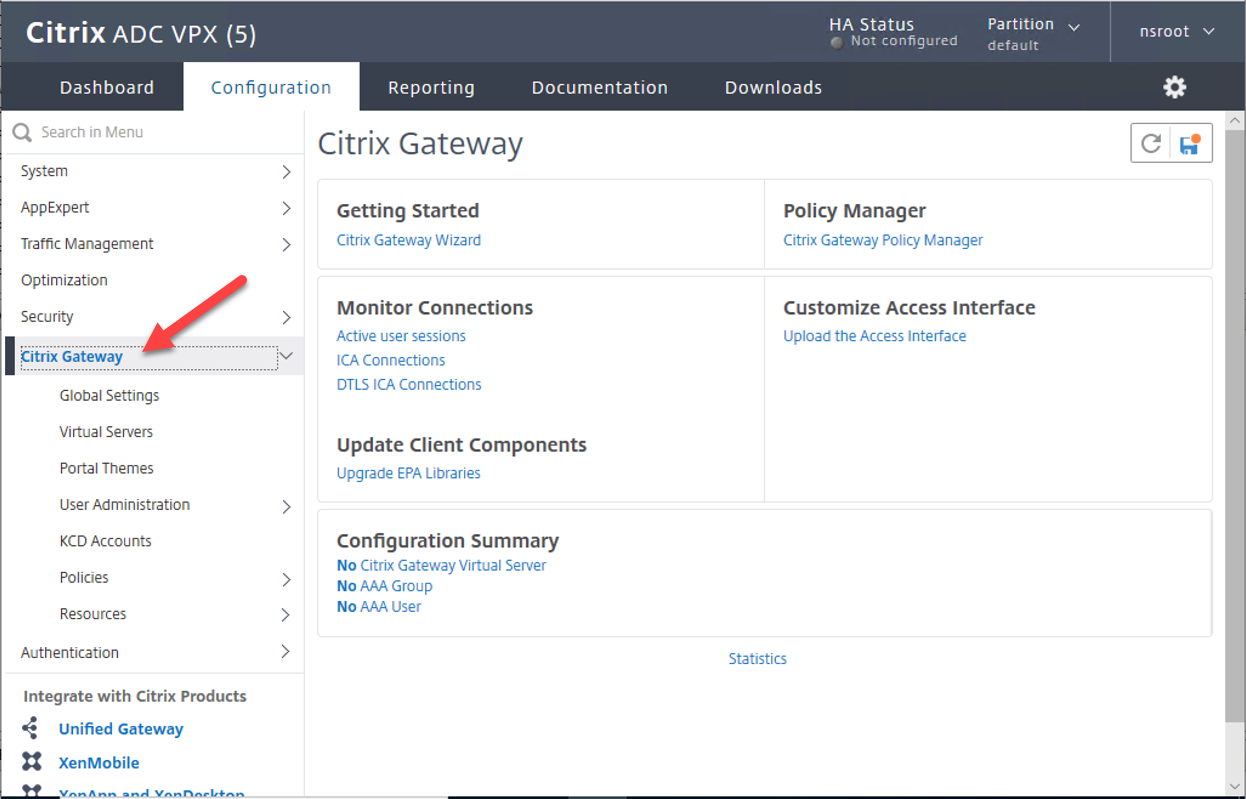
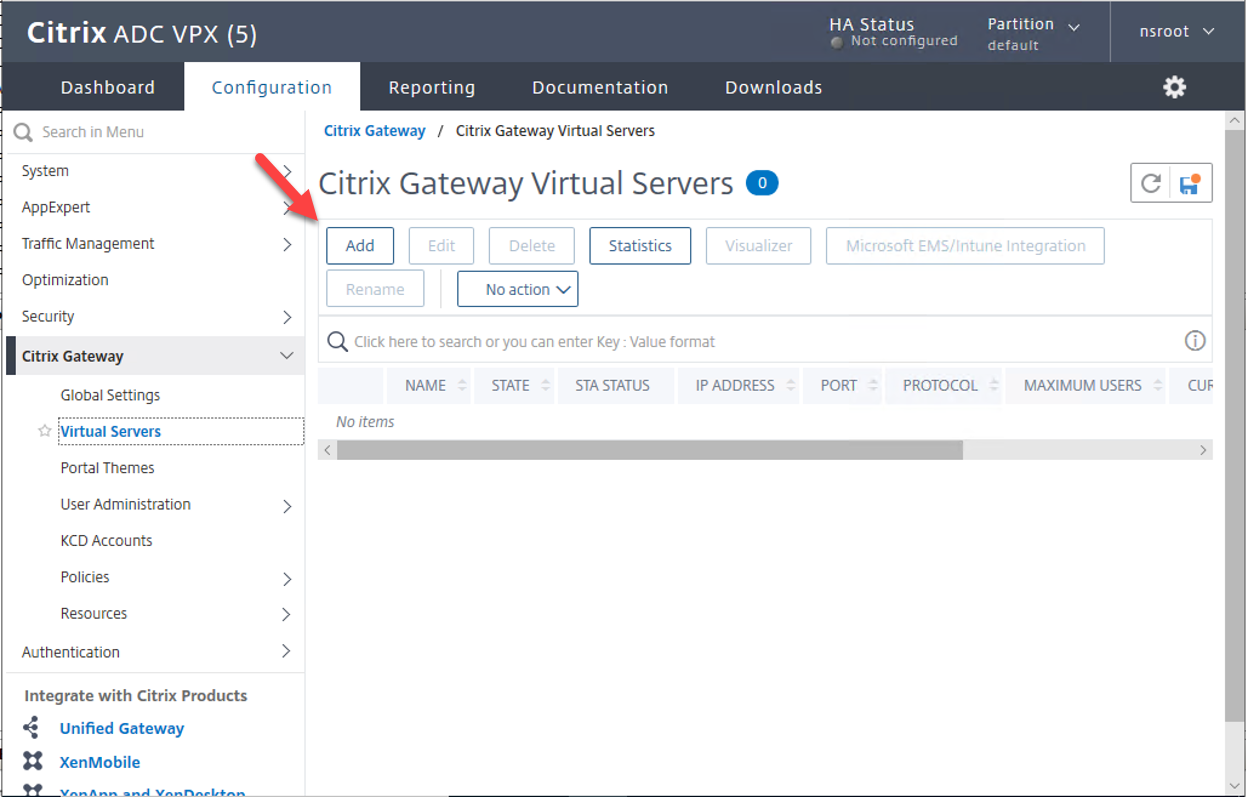
3.Select the Virtual Servers menu, click Add.
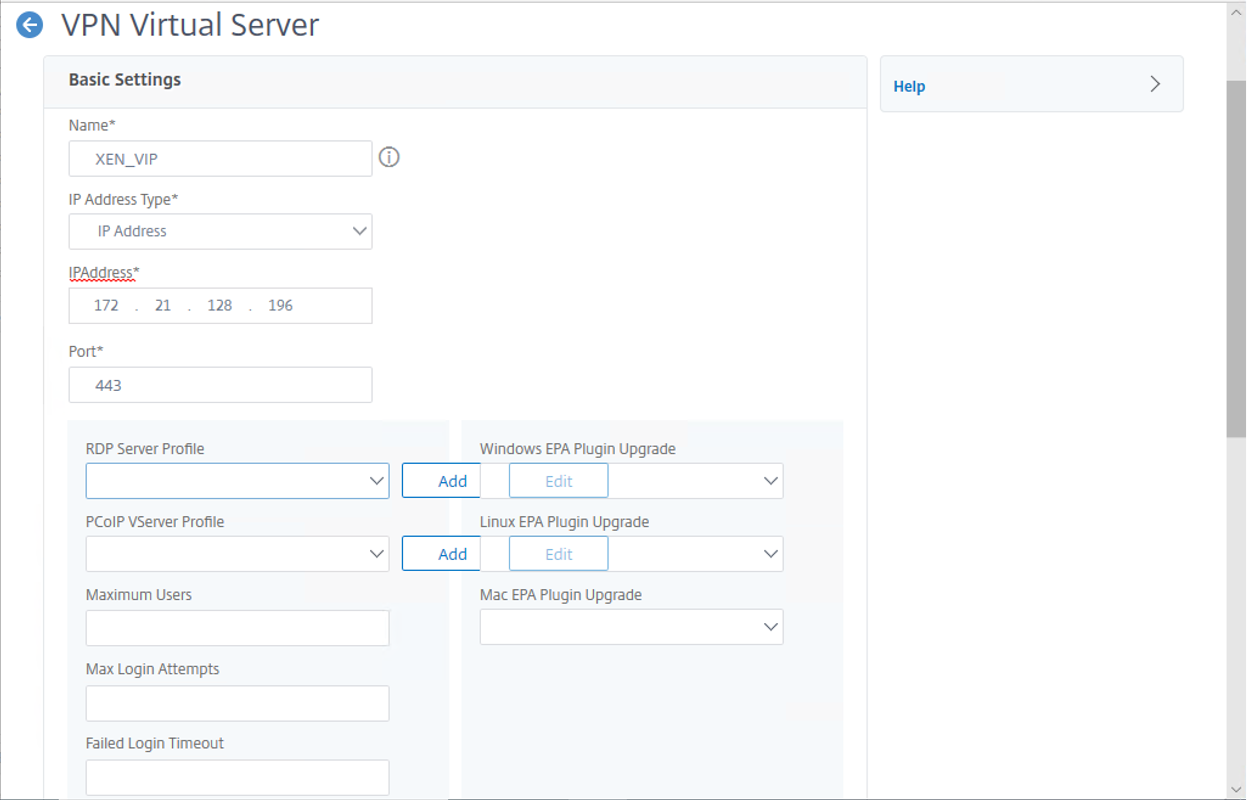
4.On the VPN Virtual Server settings, configure Basic settings values as below, click OK.
- Name: type XEN_VIP.
- IP Address Type: Select IP Address.
- IPAddress: type the Internal VIP address, in my case is 172.21.128.196.
- Port: Type 443
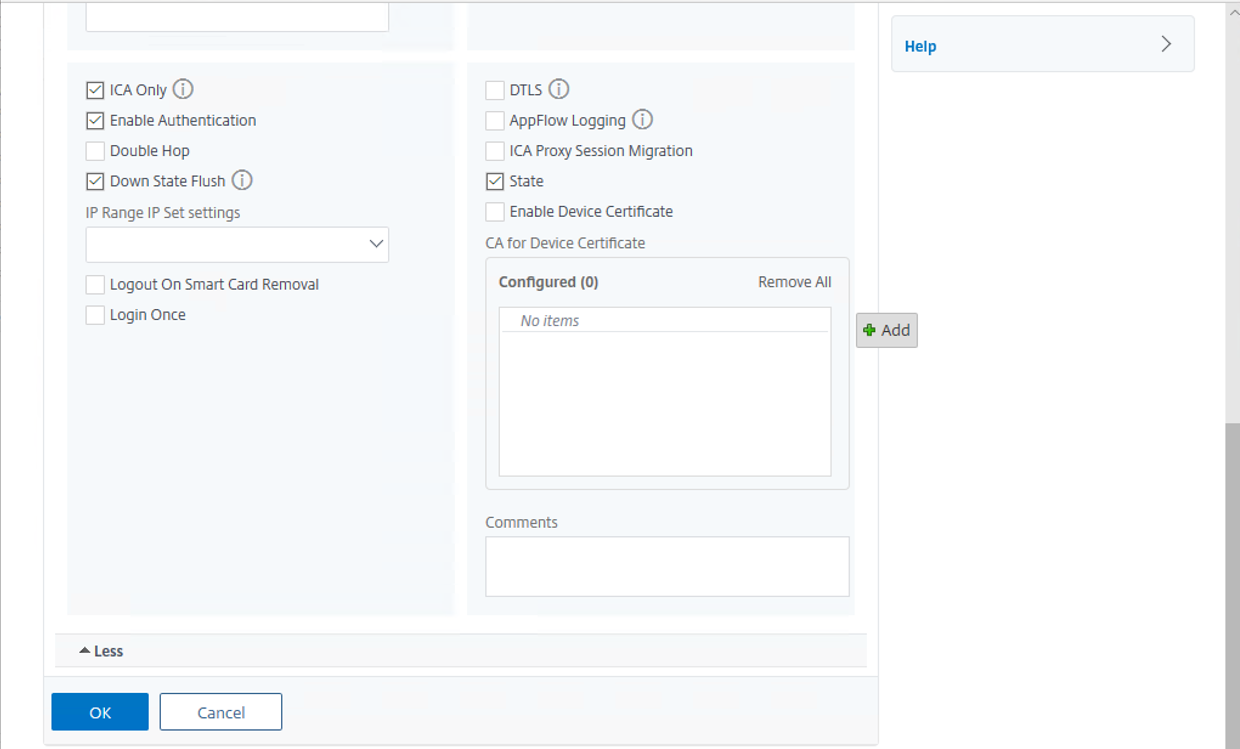
- Select ICA Only.
- Select Enable Authentication.
- Select Down State Flush.
- Select State.
5.On the VPN Virtual Server Certificate, click Server Certificate.
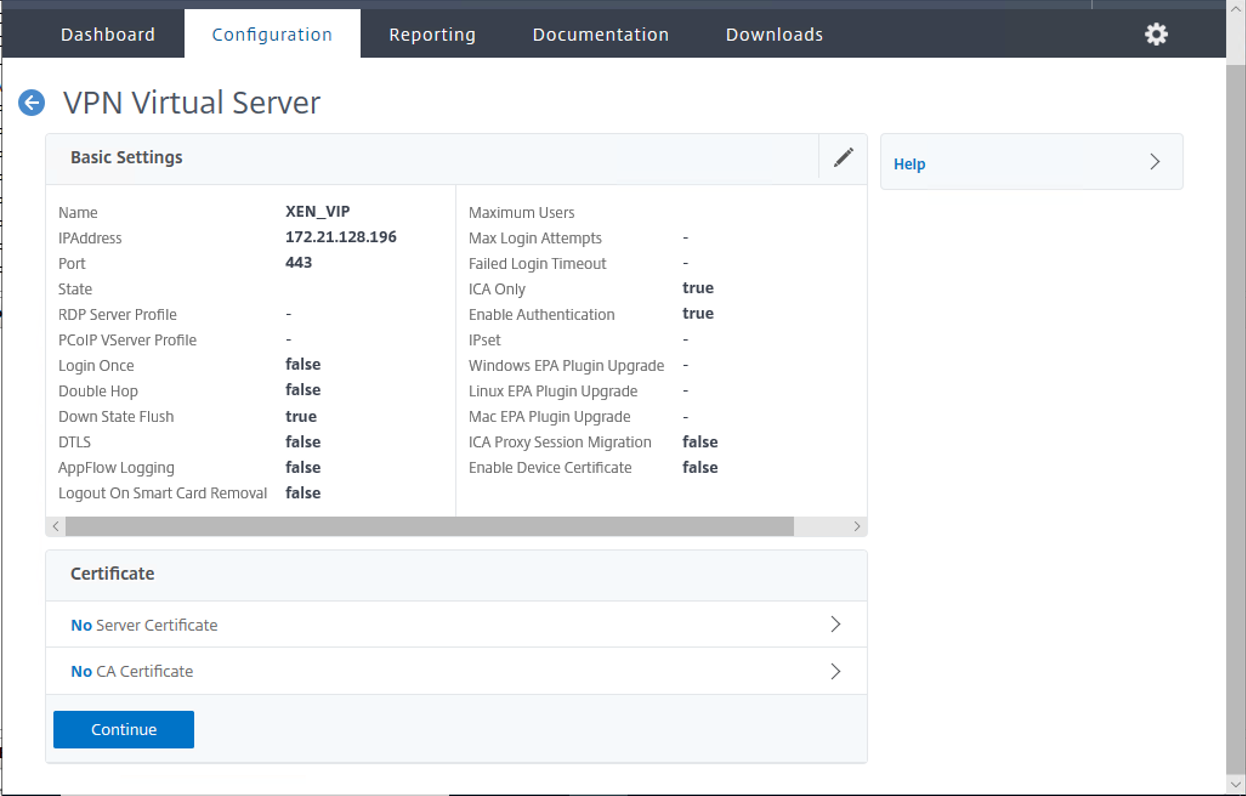
6.On the Server Certificate Binding page, click Add.
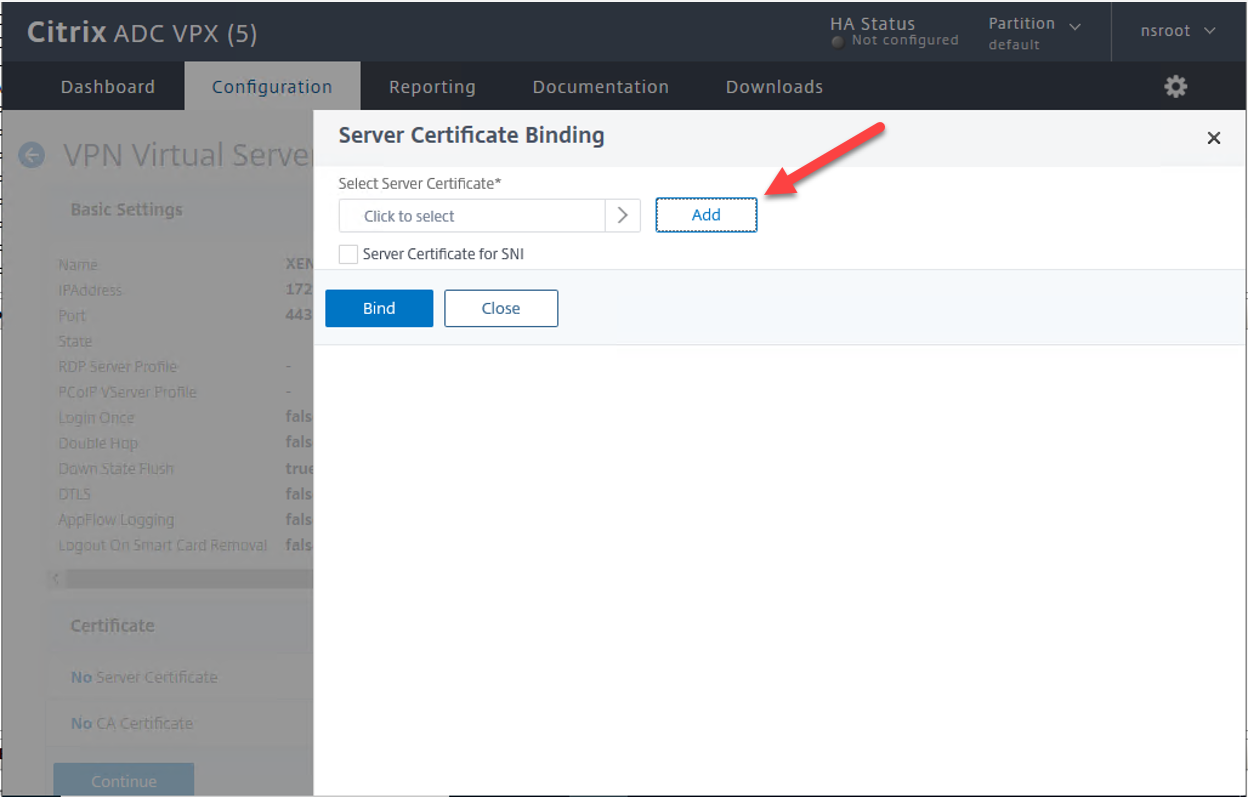
7.On the Server Certificates page, select you’re the existing certificate, click Select.
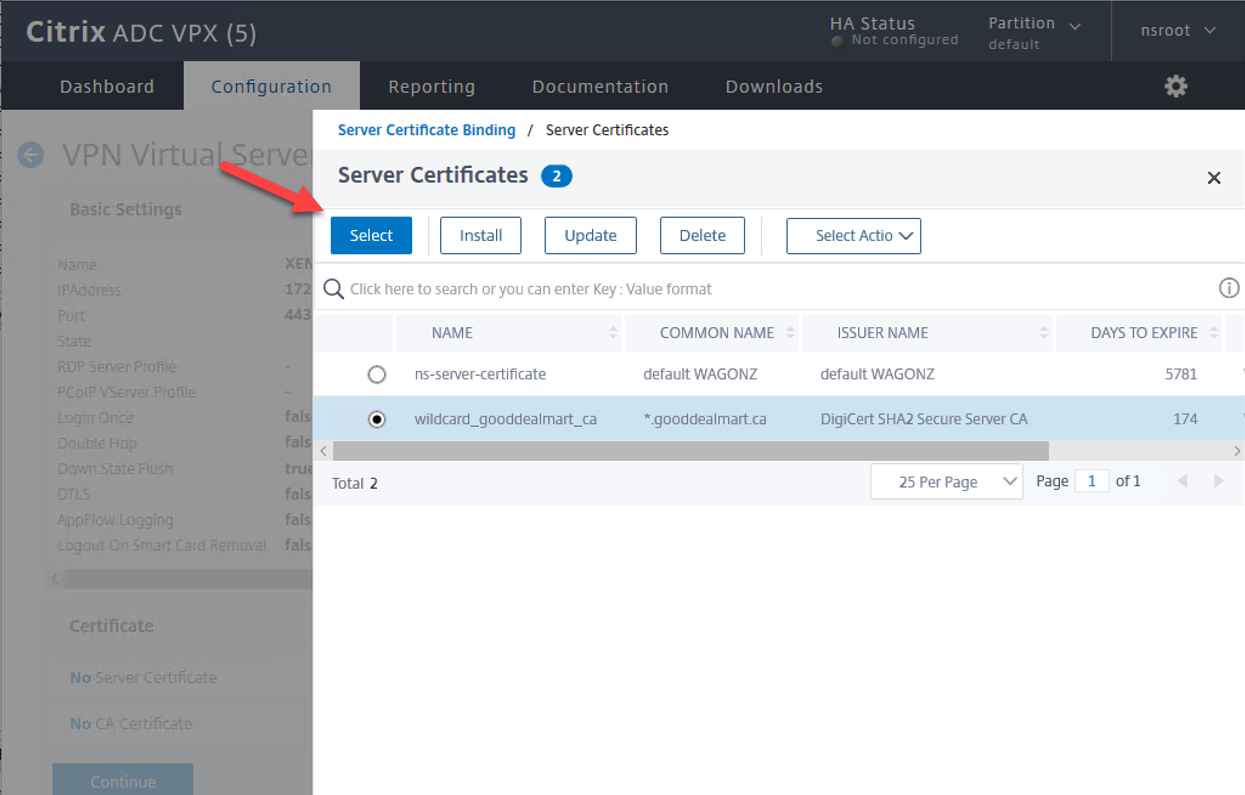
Note: you can check below link for installation certificate.
8.On the Server Certificate Binding page, click Bind.
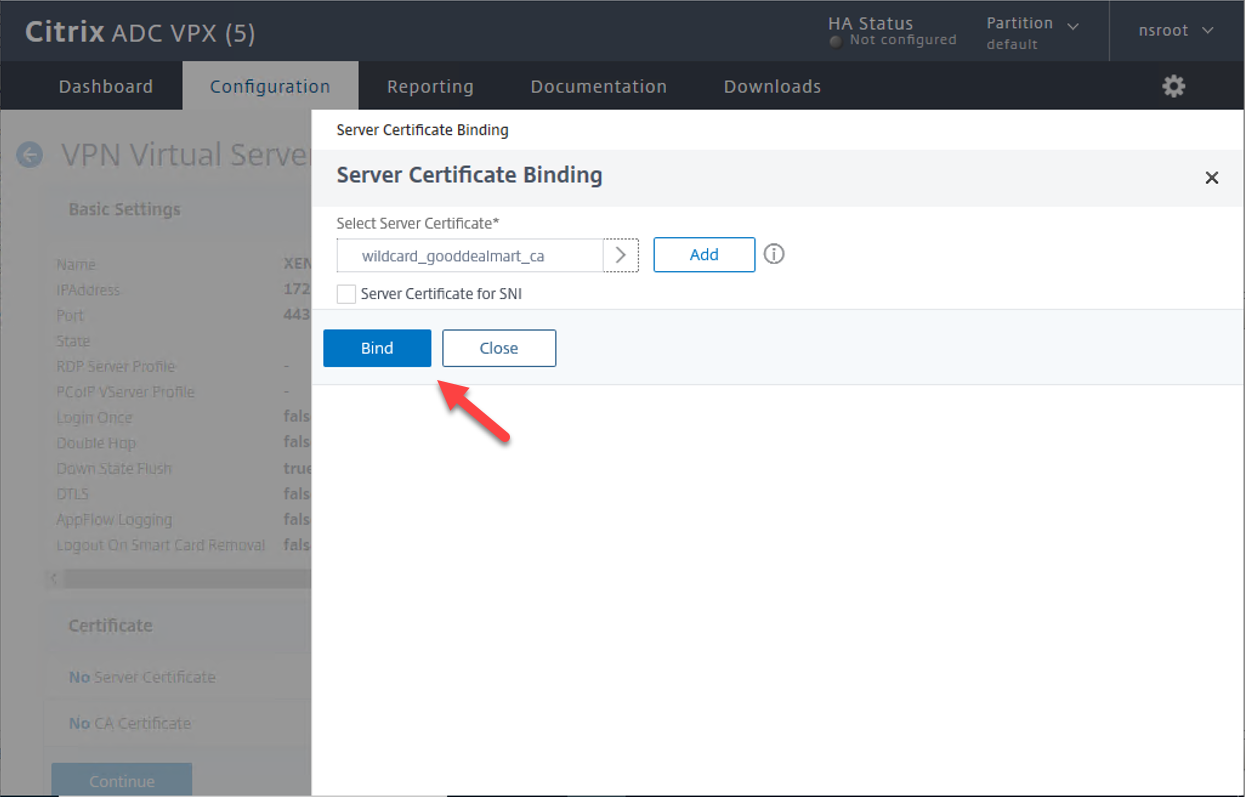
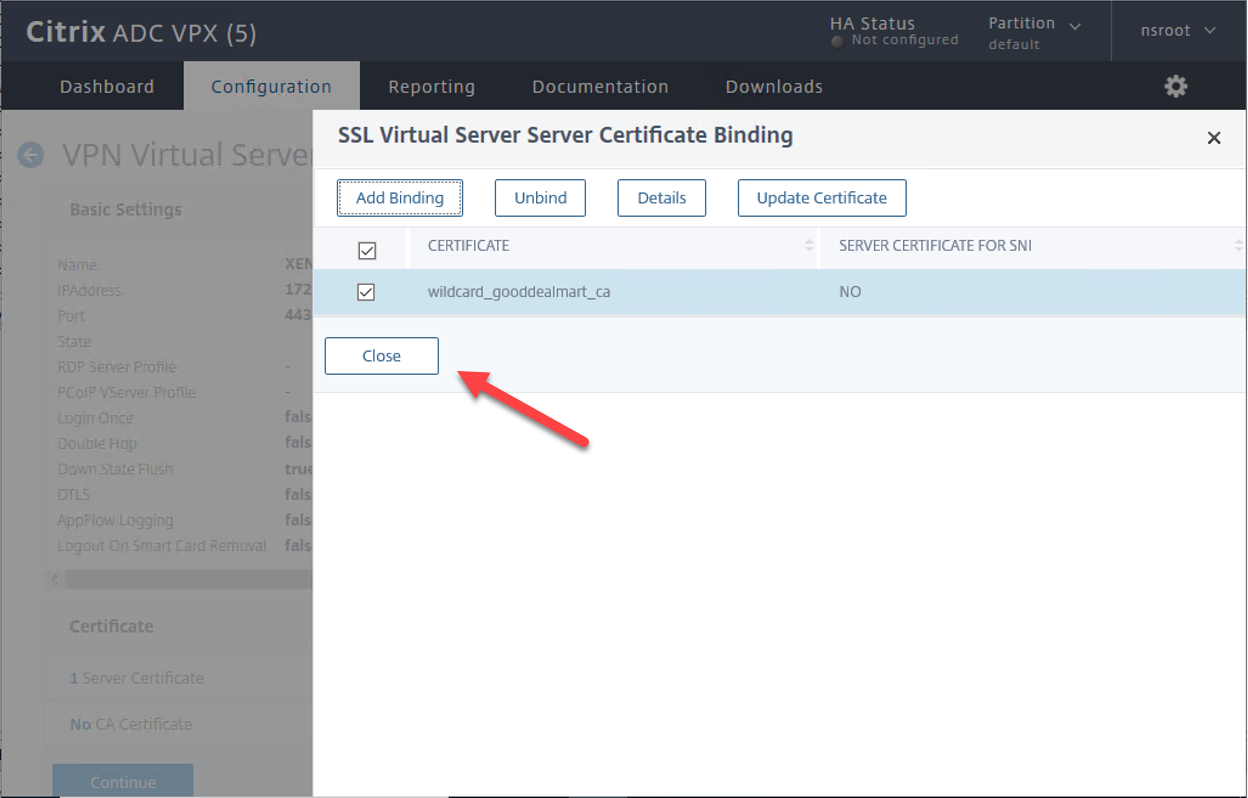
9.On the SSL Virtual Server Server Certificate Binding page, click Close.
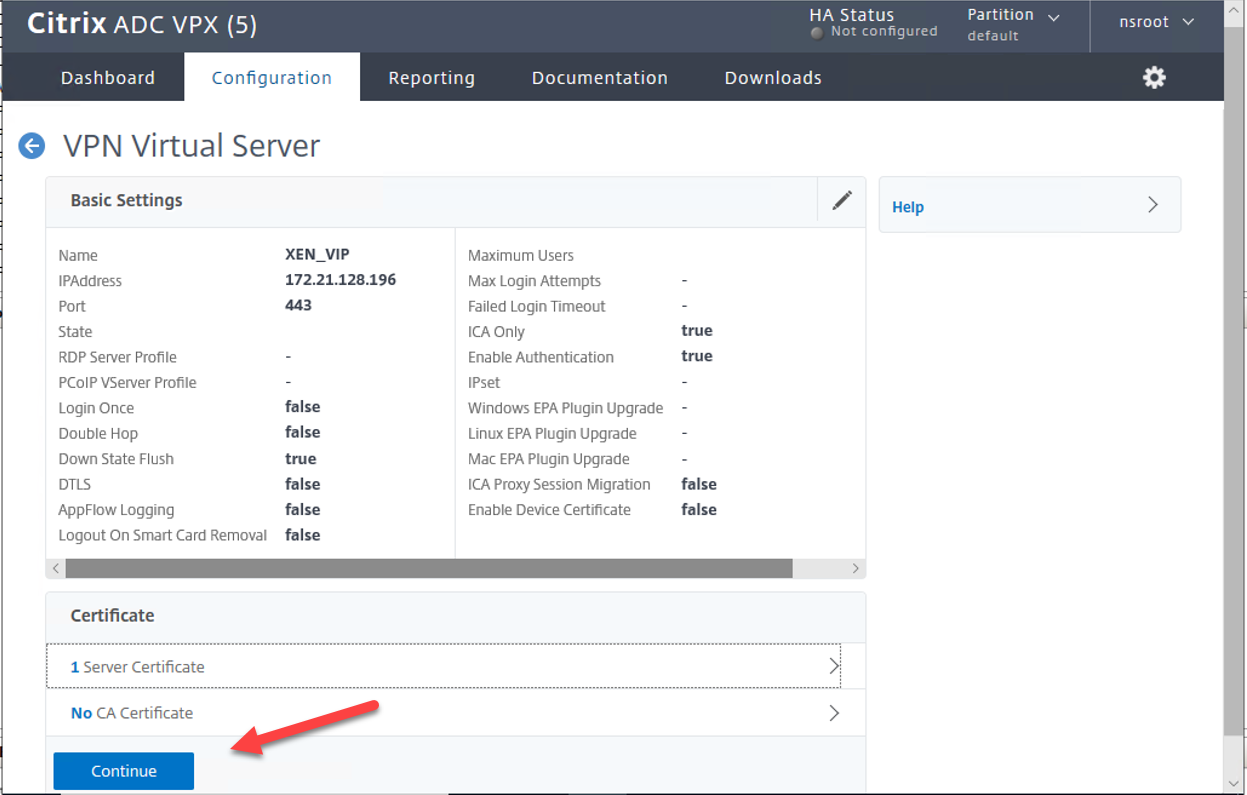
10.On the VPN Virtual Server Certificate page, click Continue.
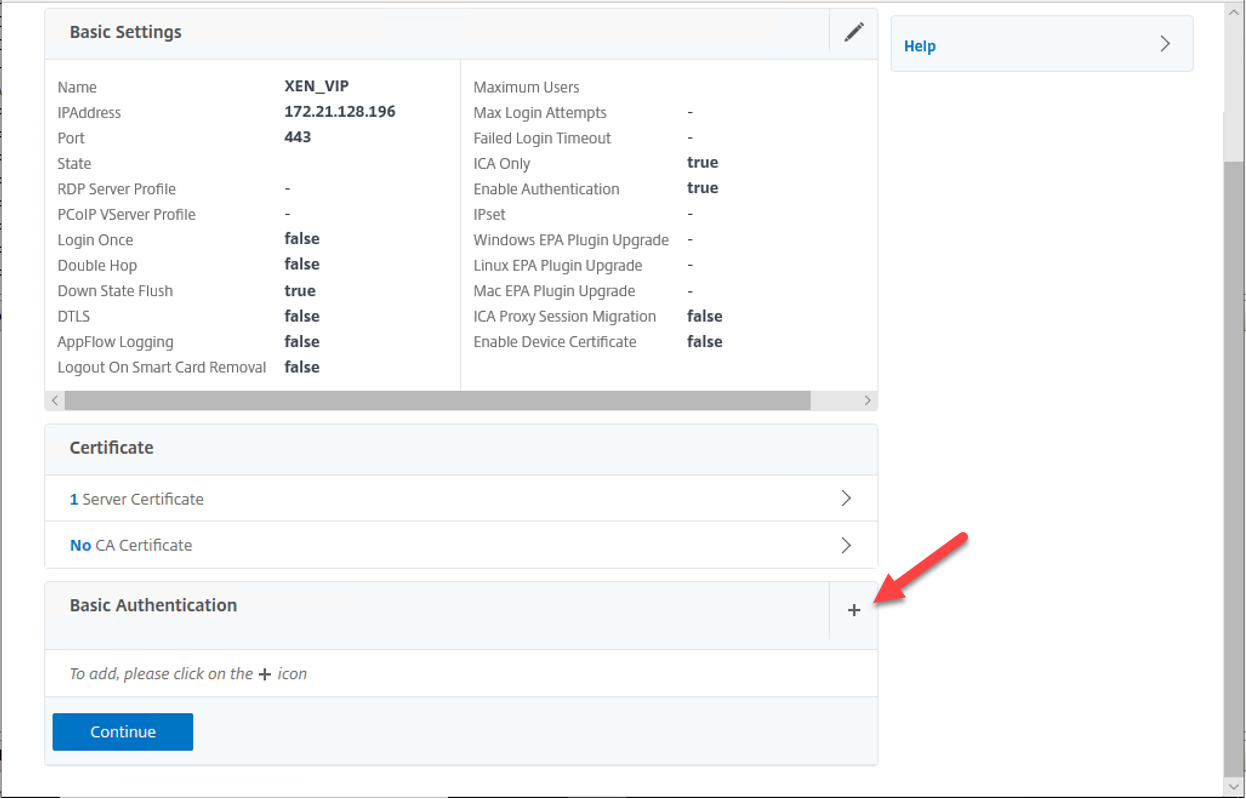
11.On the VPN Virtual Server Basic Authentication page, click +.
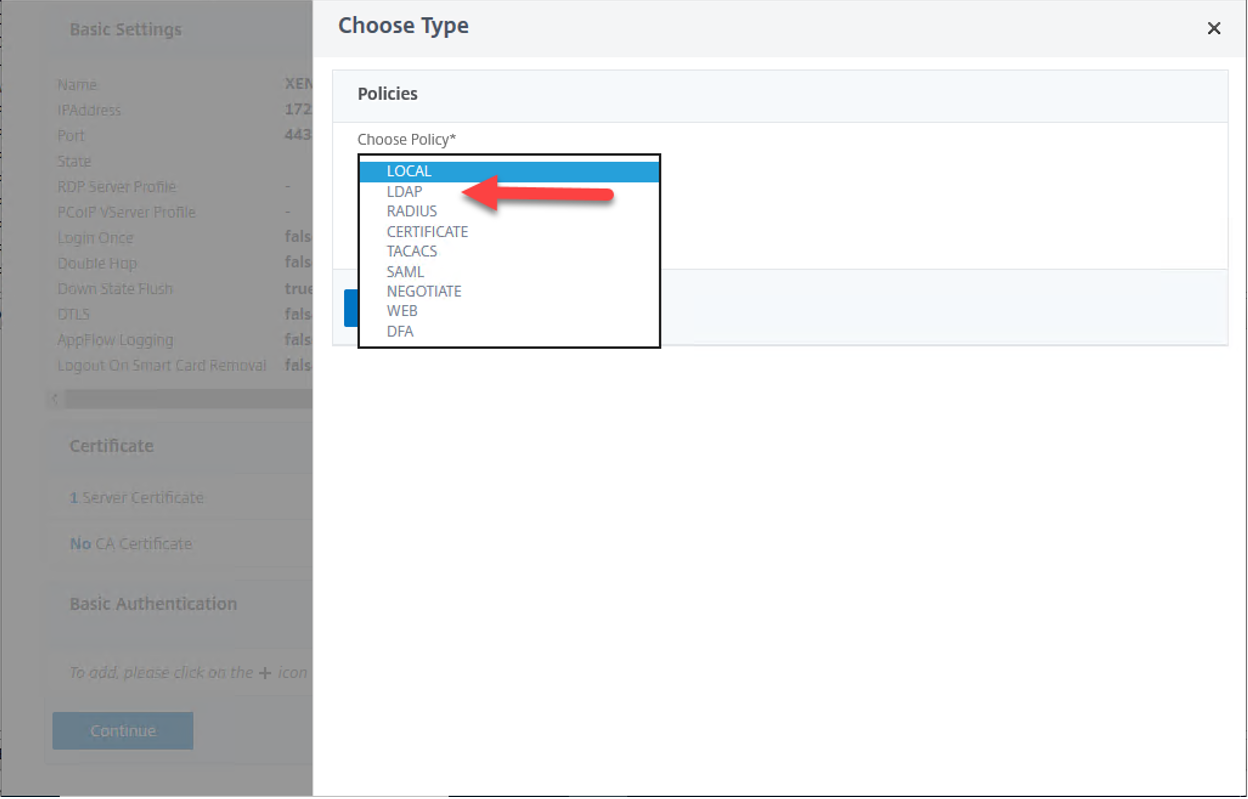
12.On the Policies page, select LDAP.
13.On the Policies page, click Continue.
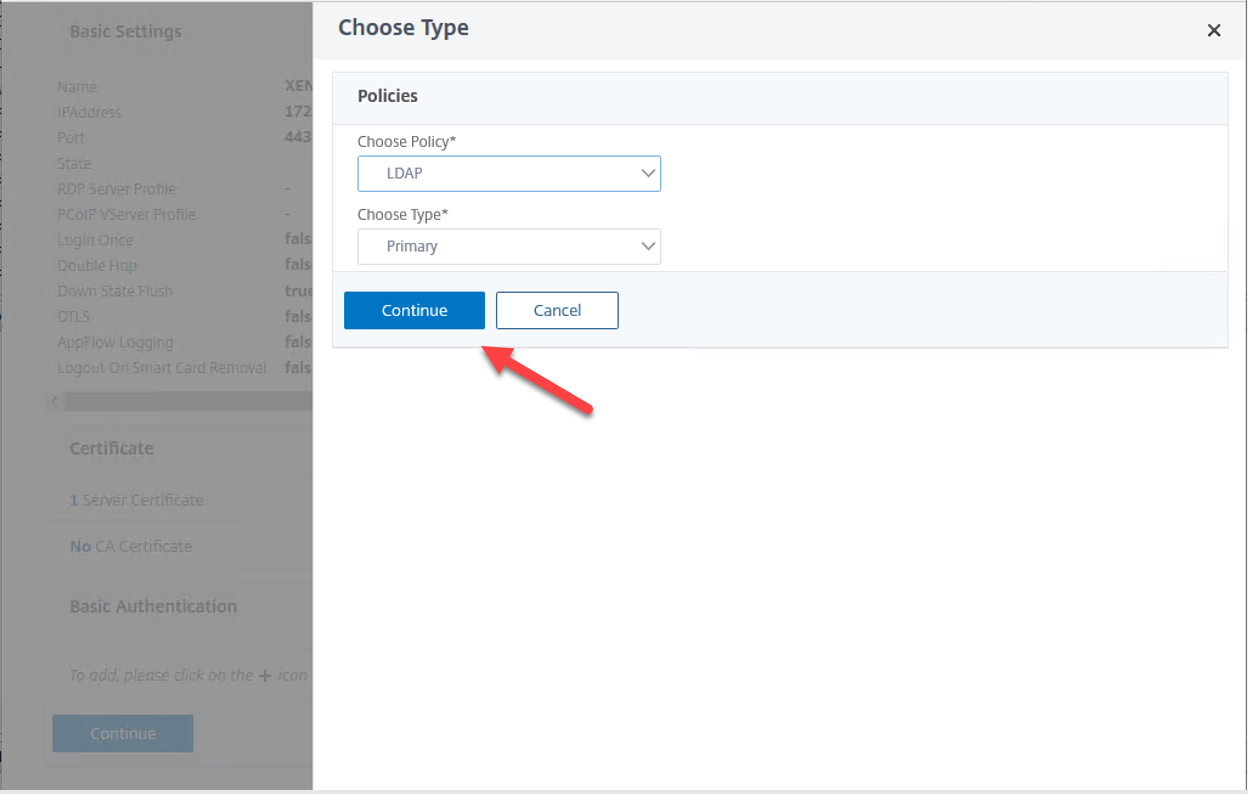
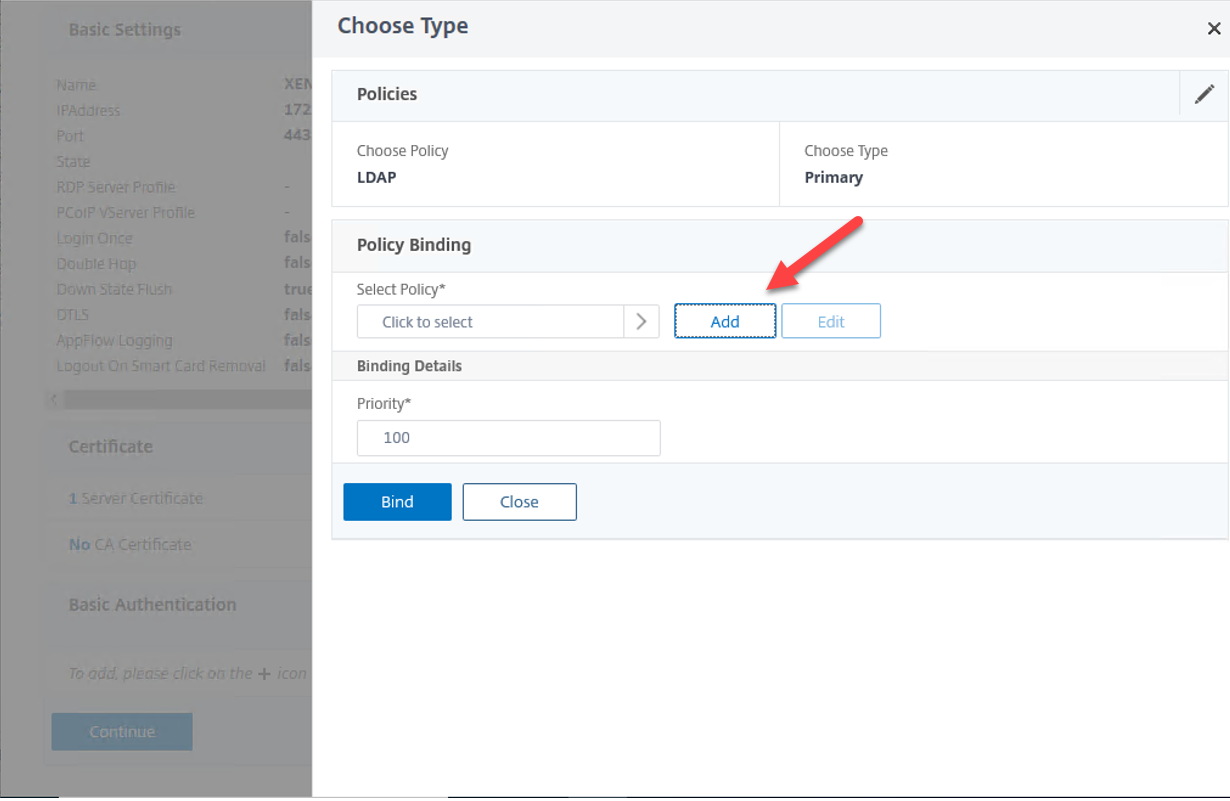
14.On the Policy Binding page, click Add.
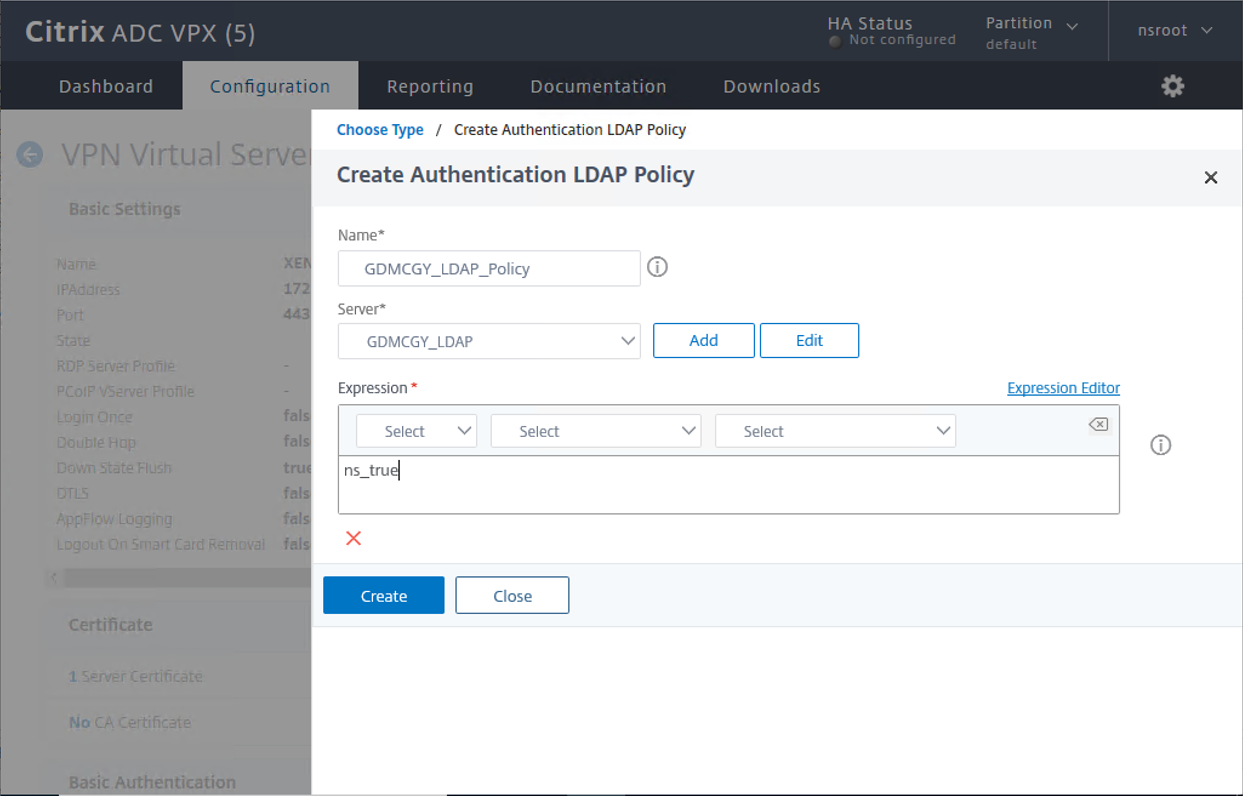
15.On the Create Authentication LDAP Policy page, configure setting values as below, click Create
- Name: Type the Authentication LDAP policy name, in my case is GDMCGY_LDAP_Policy.
- Server: Select the Authentication LDP server.
- Expression: type ns-true.
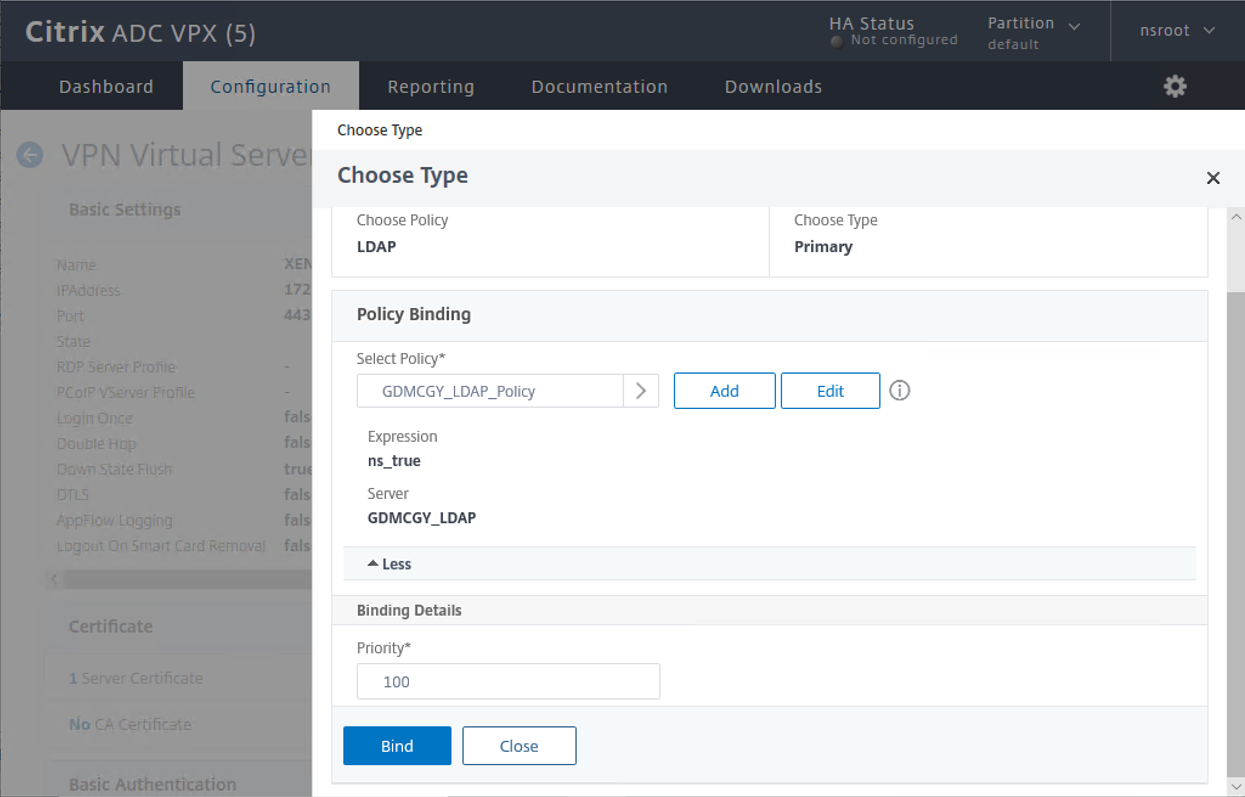
16.On the Choose Type page, click Bind.
17.On the VPN Virtual Server Basic Authentication page, click Continue.
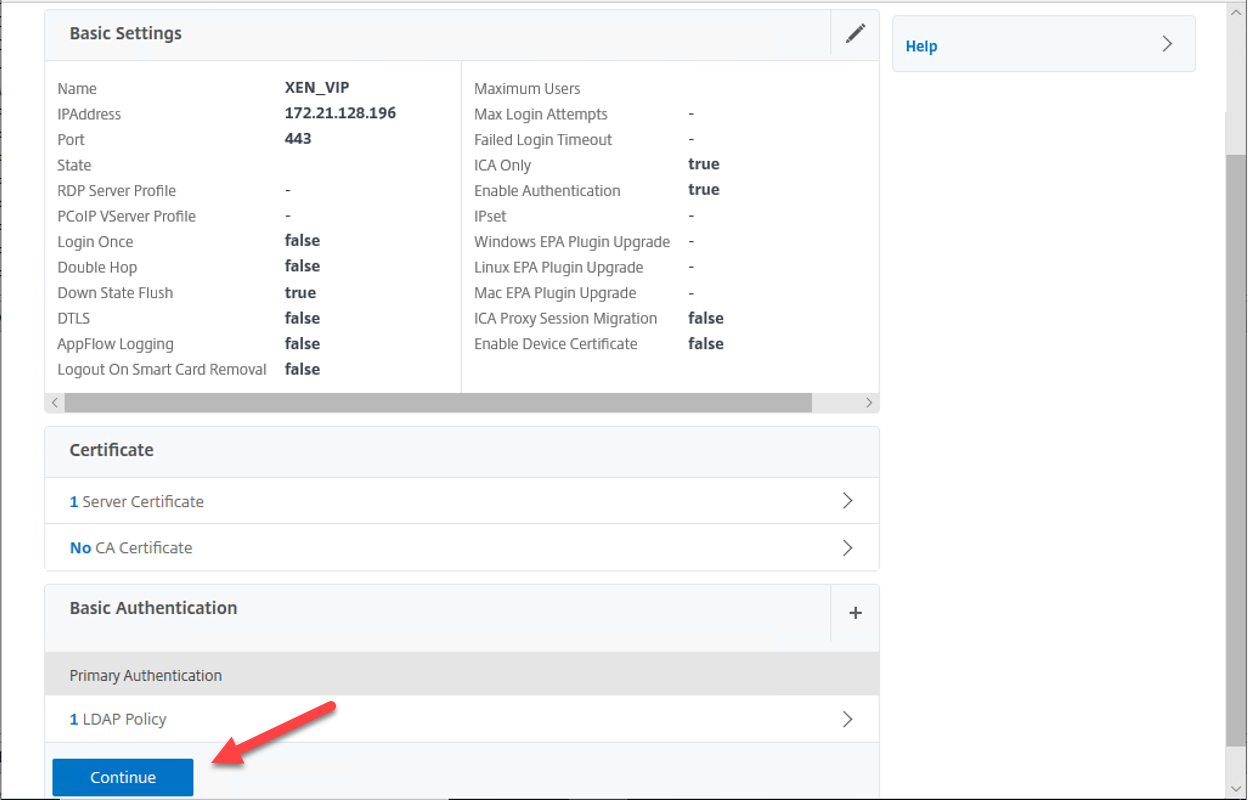
18.On the VPN Virtual Server Advanced Authentication page, click Continue.
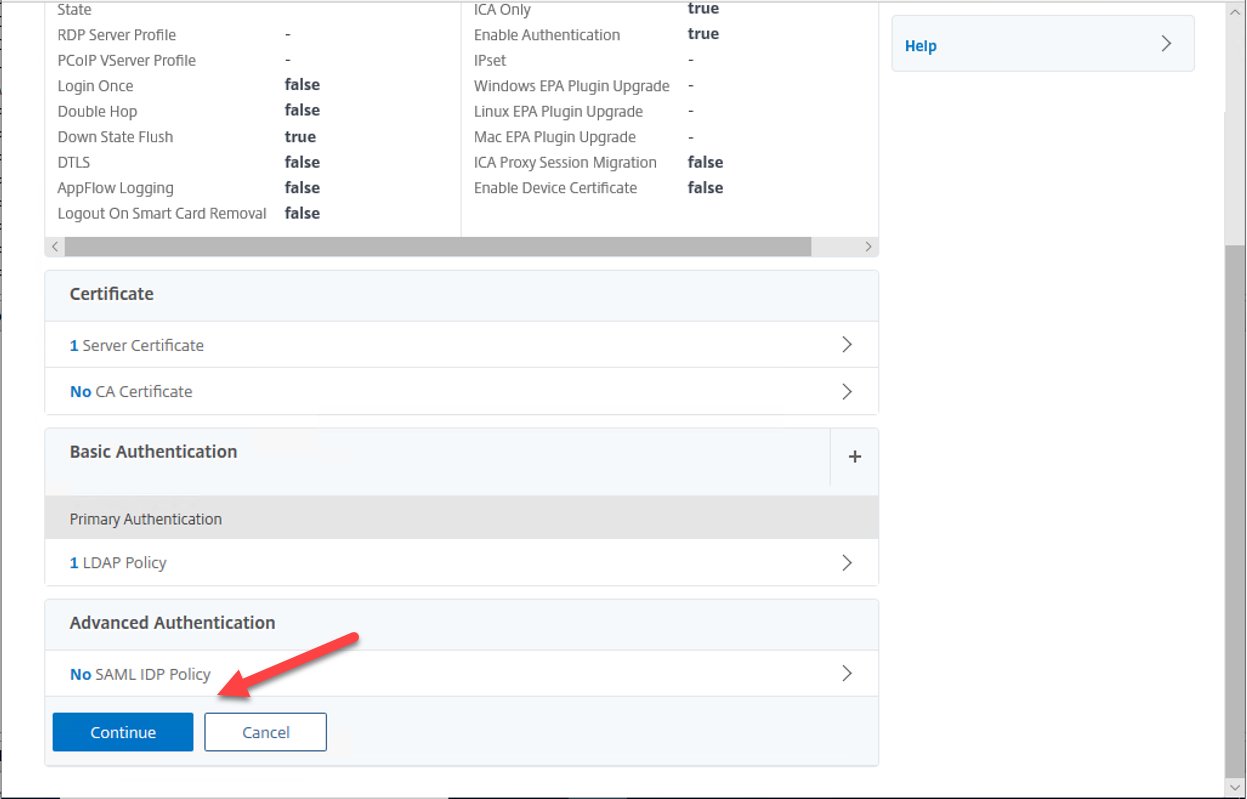
19.On the SSL Ciphers, ECC Curve and Profiles page, keep the default settings.
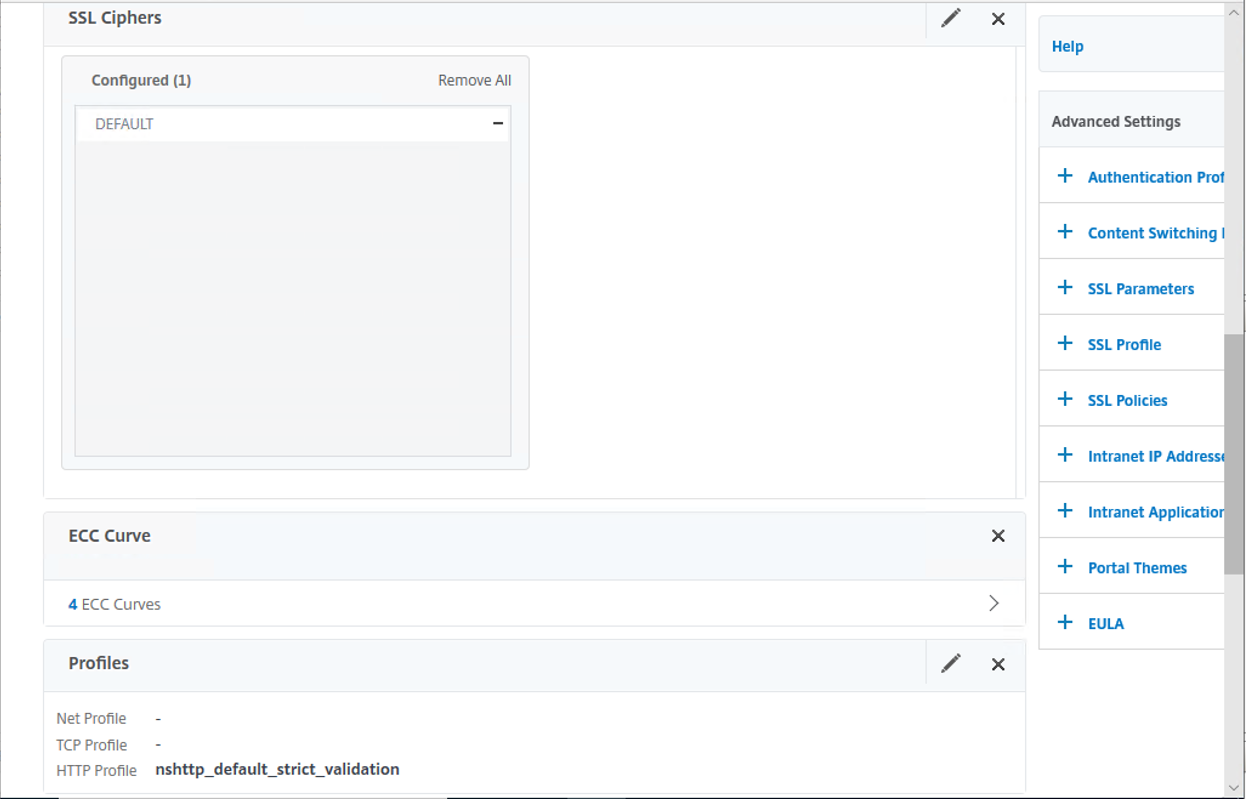
20.On the Other Settings, Policies page, keep the default settings.
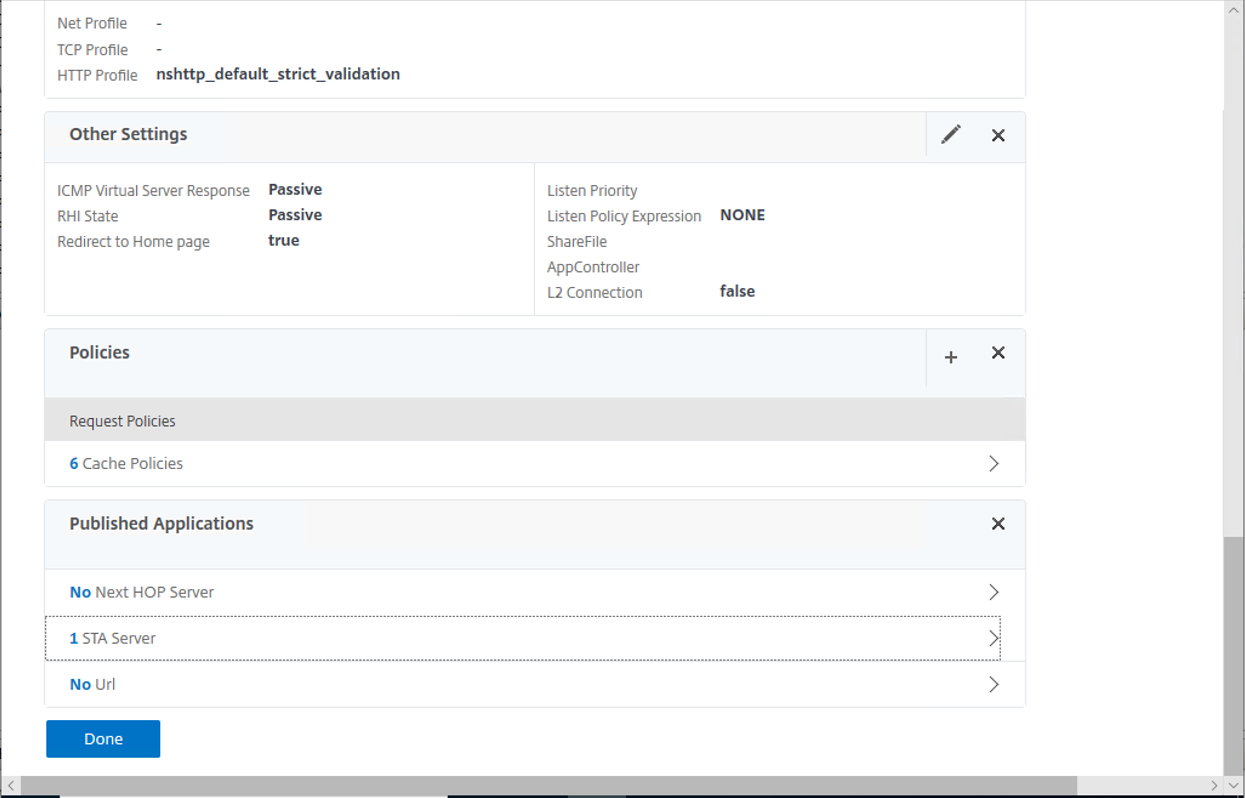
21.On the Published Applications, click STA Server.
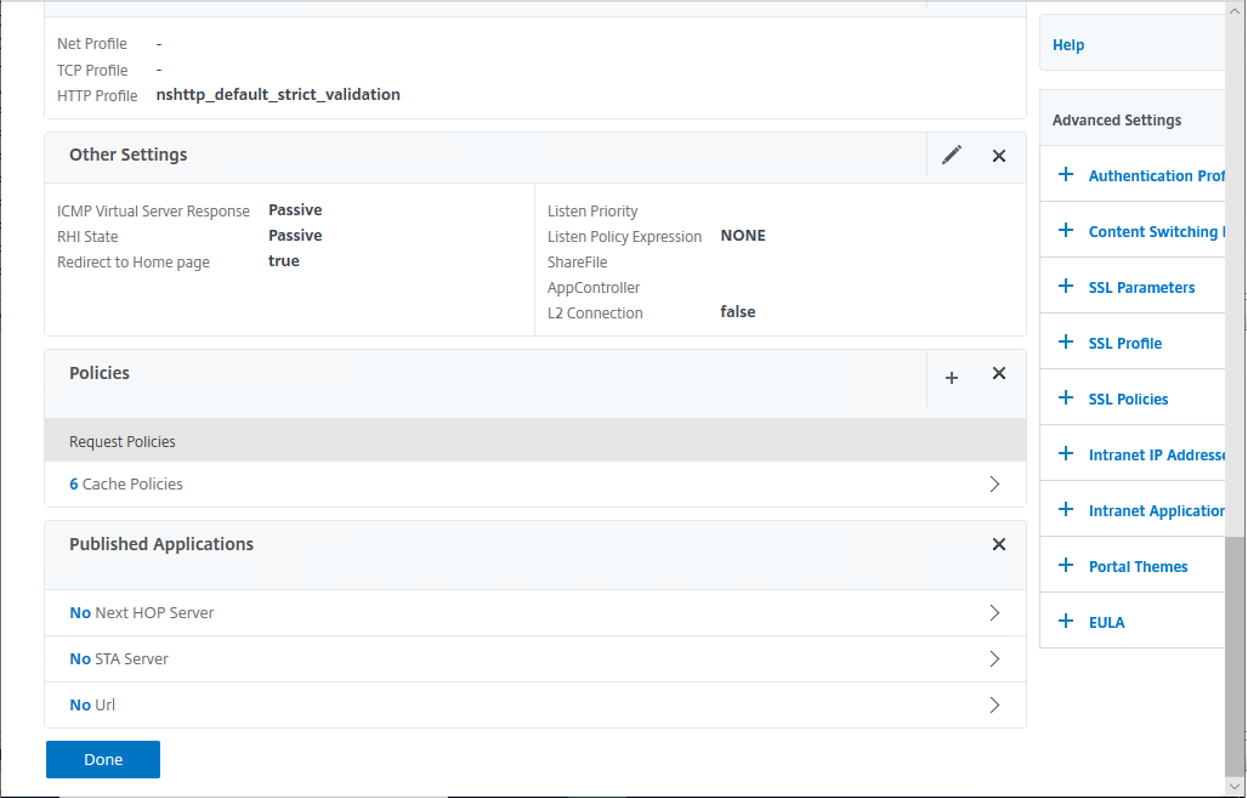
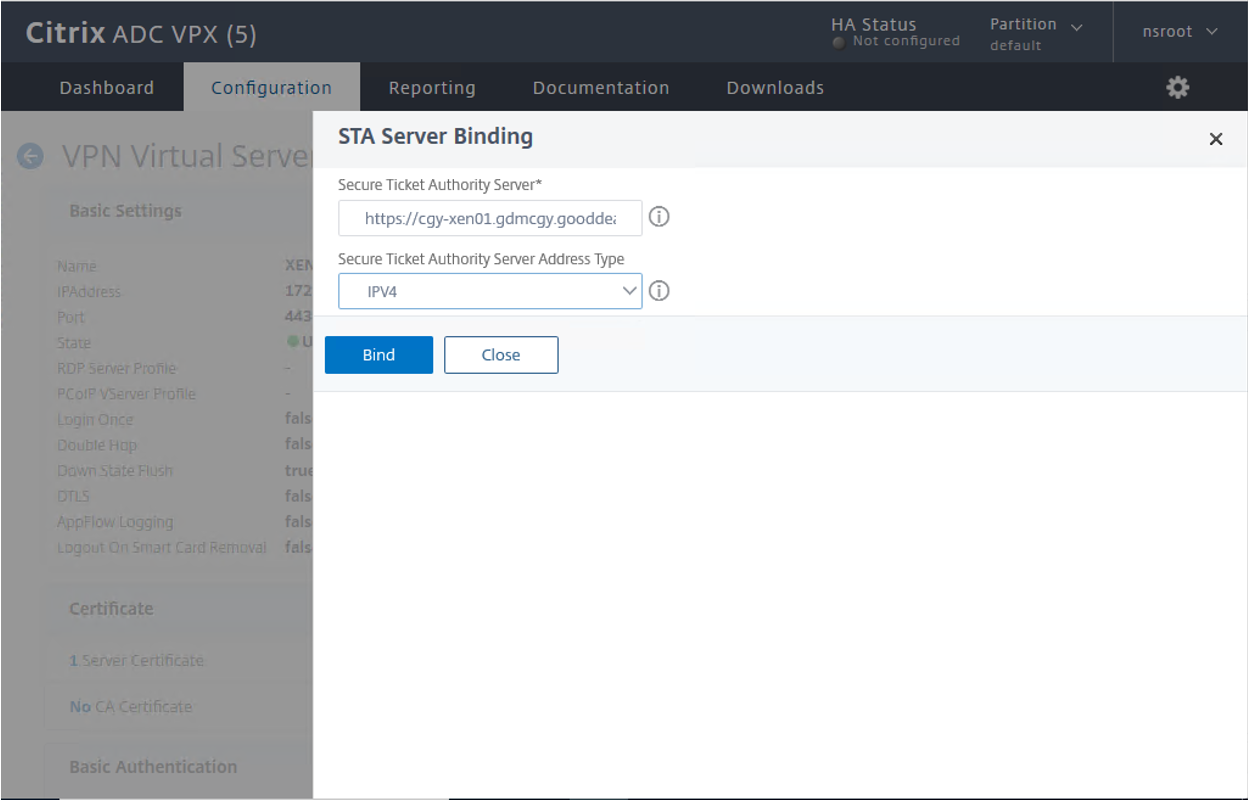
22.On the STA Server Binding page, configure setting values as below, click Bind.
- Secure Ticket Authority Server: type virtual app server url, in my case is https://cgy-xen01.gdmcgy.gooddealmart.ca
- Secure Ticket Authority Server Address Type: Select IPV4.
23.VPN Virtual Server page, click Done.
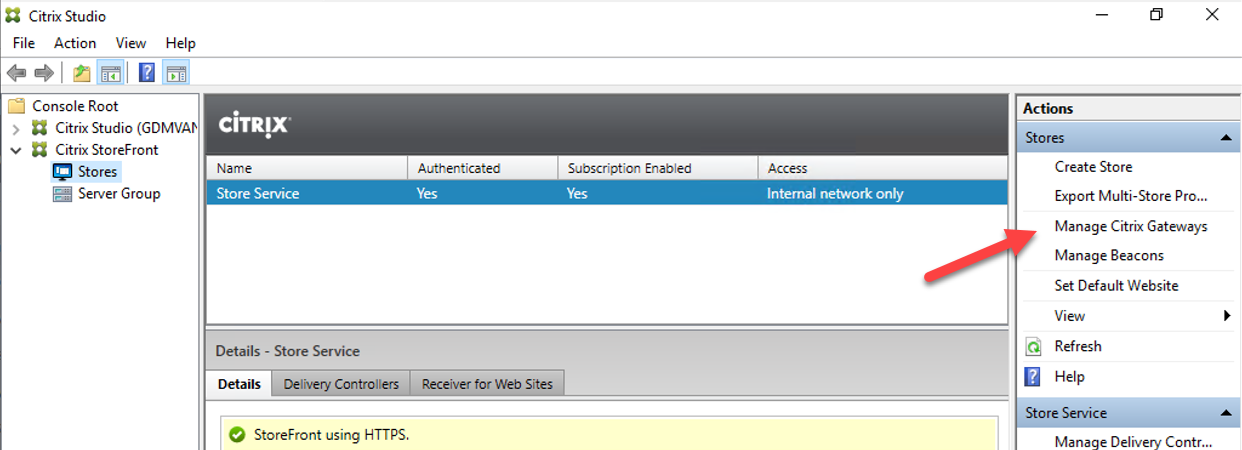
24.Loin to virtual app server, open Citrix Studio.
25.On the Citrix StoreFront, select Stores, select Store Service, click Manage Citrix Gateways of Stores Actions.
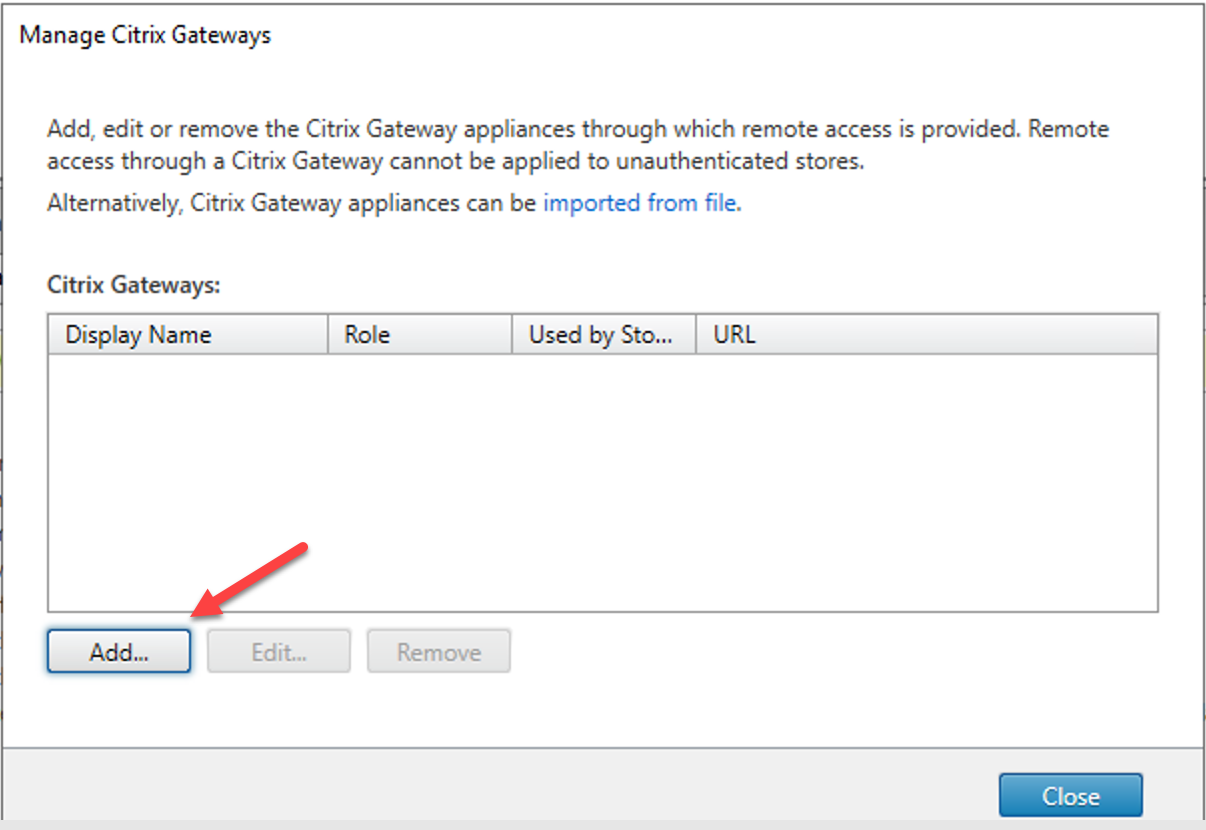
26.On the Manage Citrix Gateways page, click Add.
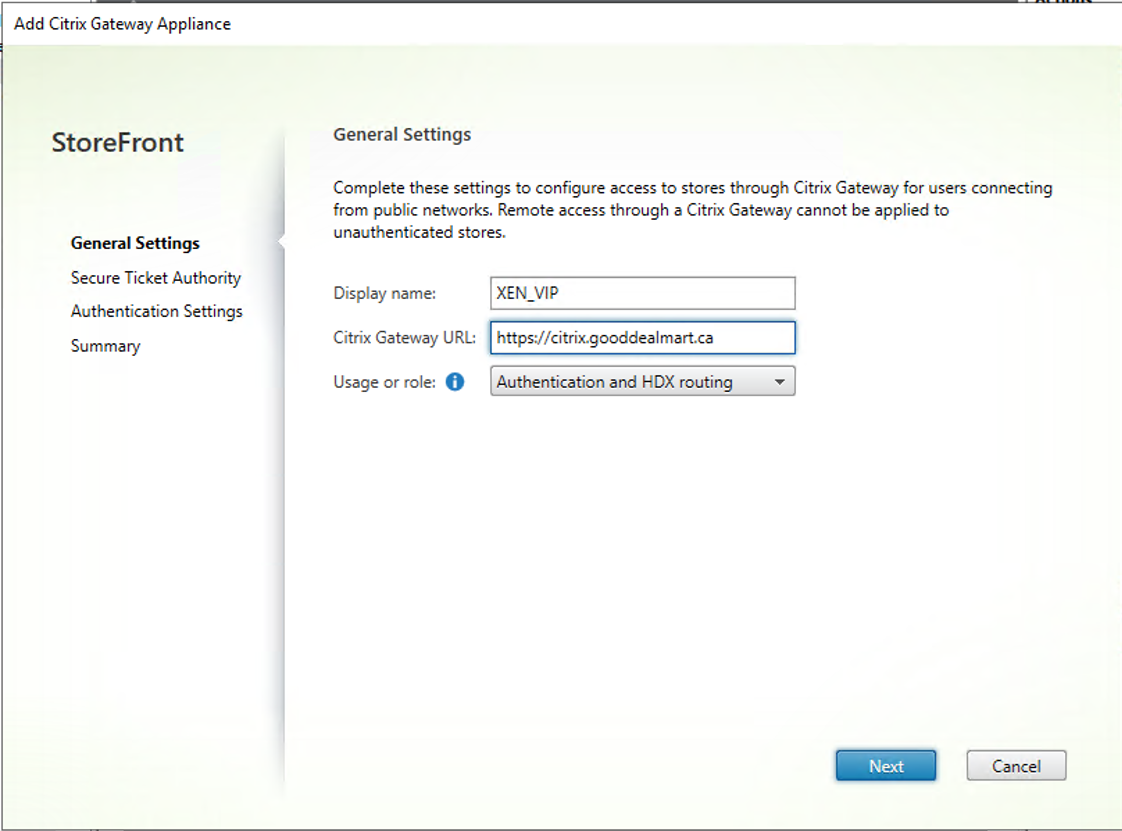
27.On the General page, configure setting values as below, click Next.
- Display Name: Type XEN_VIP.
- Citrix Gateway URL: Type Https://citrix.gooddealmart.ca
- Usage or role: select Authentication and HDX routing.
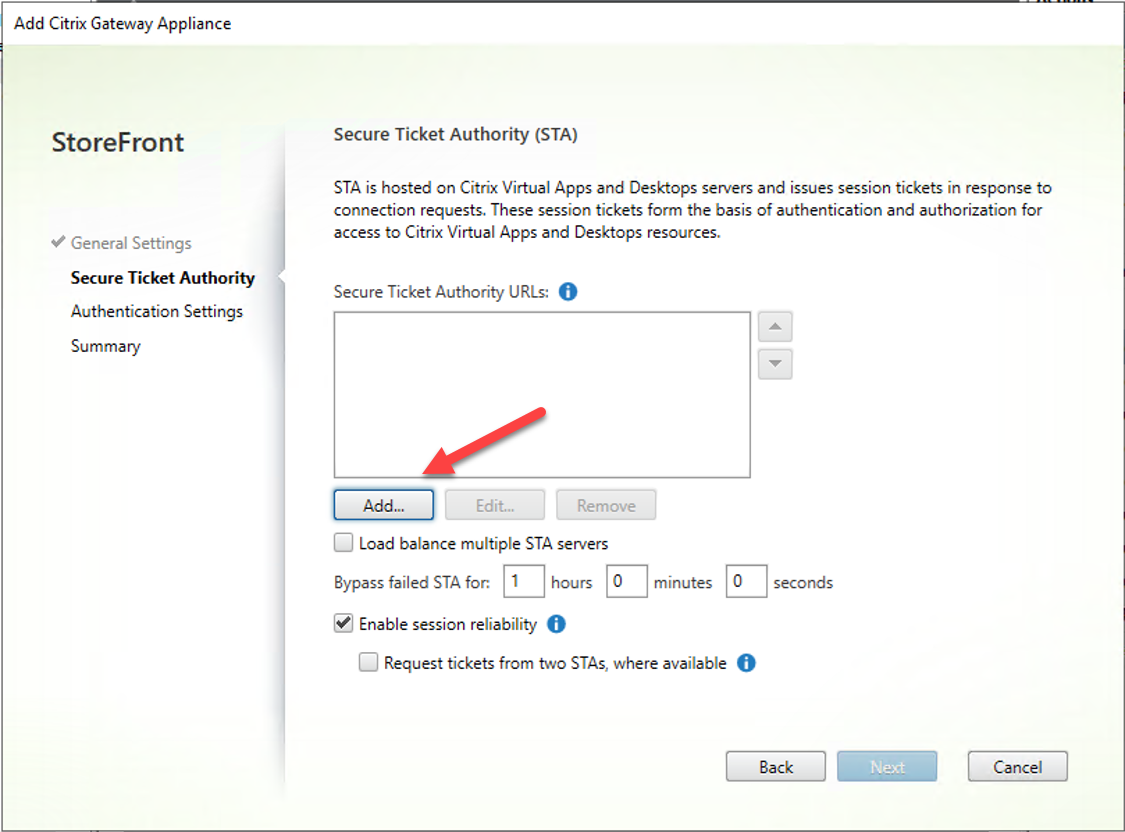
28.On the Secure Ticket Authority (STA) page, click Add for Secure Ticket Authority URLs.
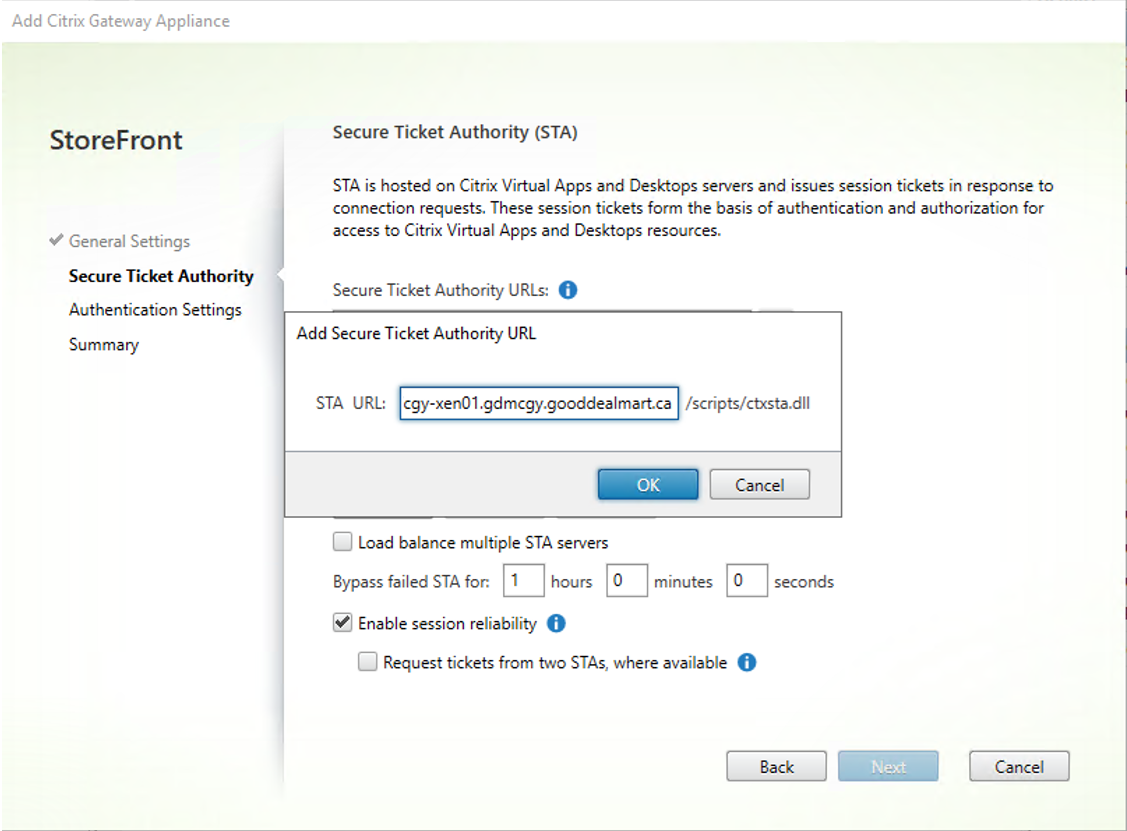
29.On the Add Secure Ticket Authority URL, type the virtual server FQDN, in my case is cgy-xen01.gdmcgy.gooddealmart.ca, click OK.
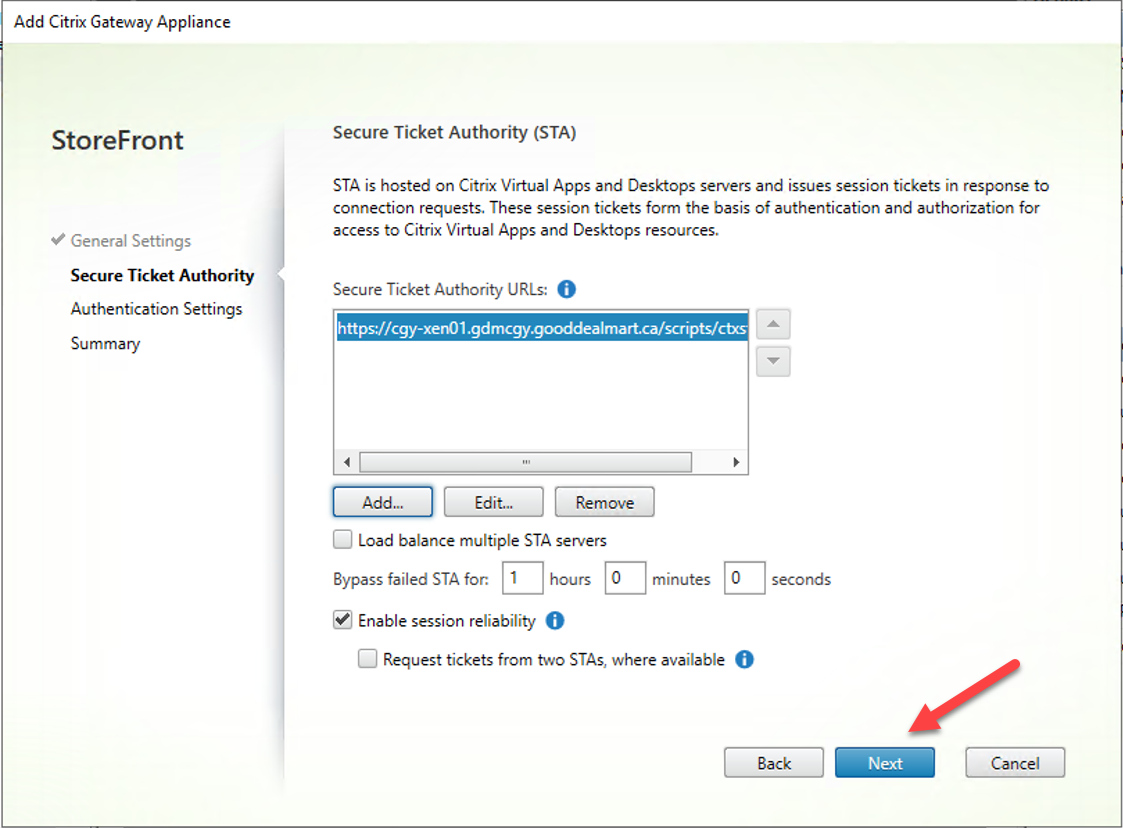
30.On the Secure Ticket Authority (STA) page, click Next.
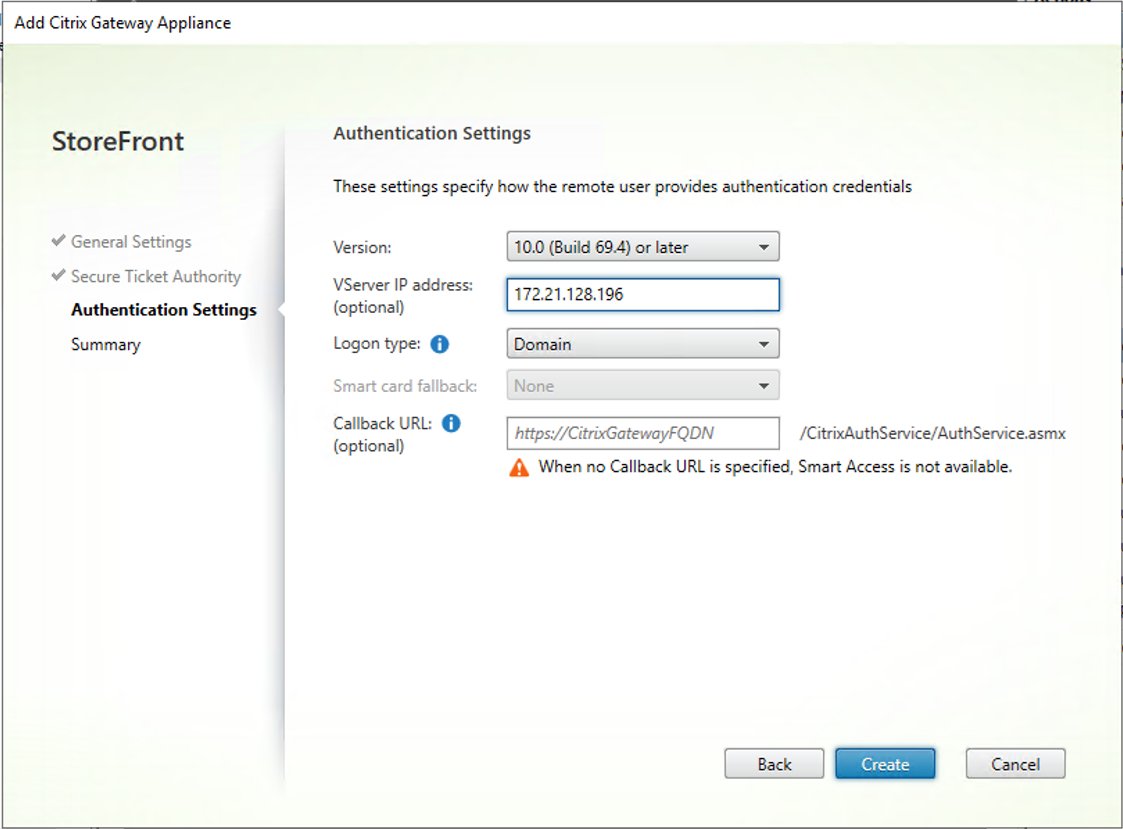
31.On the Authentication Settings page, configure setting values as below, click Create.
- Version: Select 10.0 (Build 69.4) or later.
- VServer IP Address: enter the IP address of VPN Virtual Server. In my case is 172.21.128.196.
- Logon type: Select Domain.
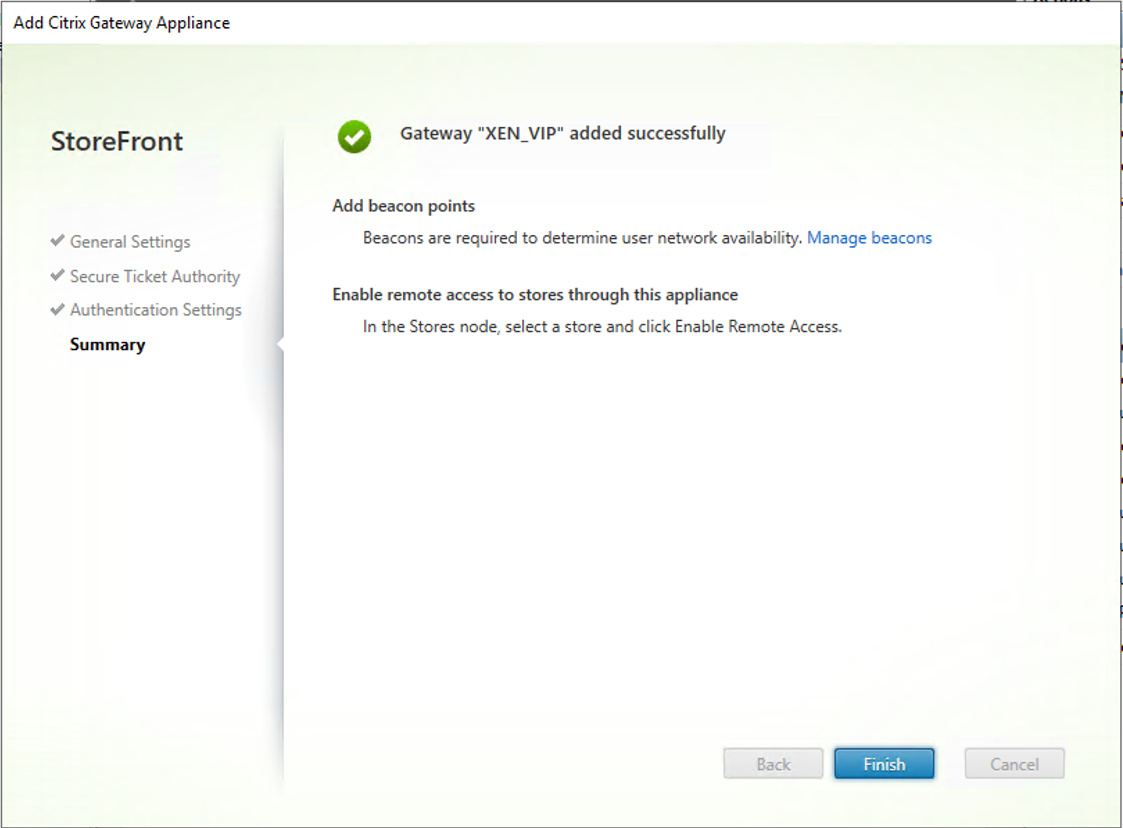
32.On the Summary page, verify add gateway succeeded, click Finish.
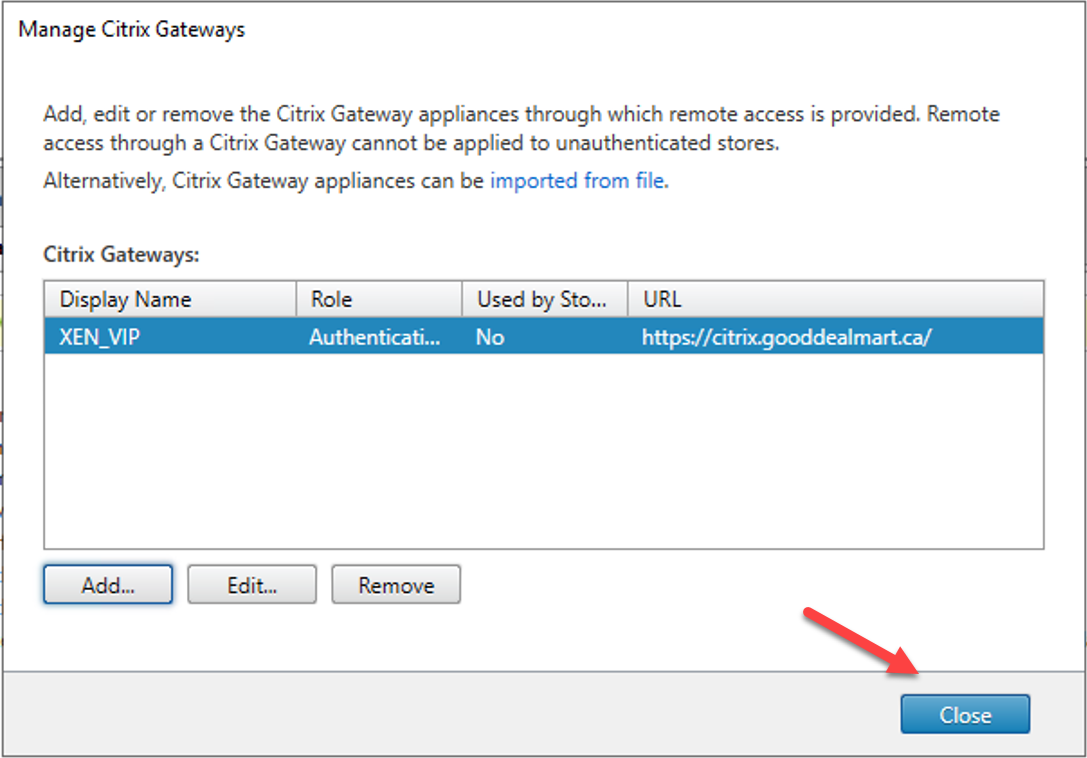
32.On the Manage Citrix Gateways page, click Close.
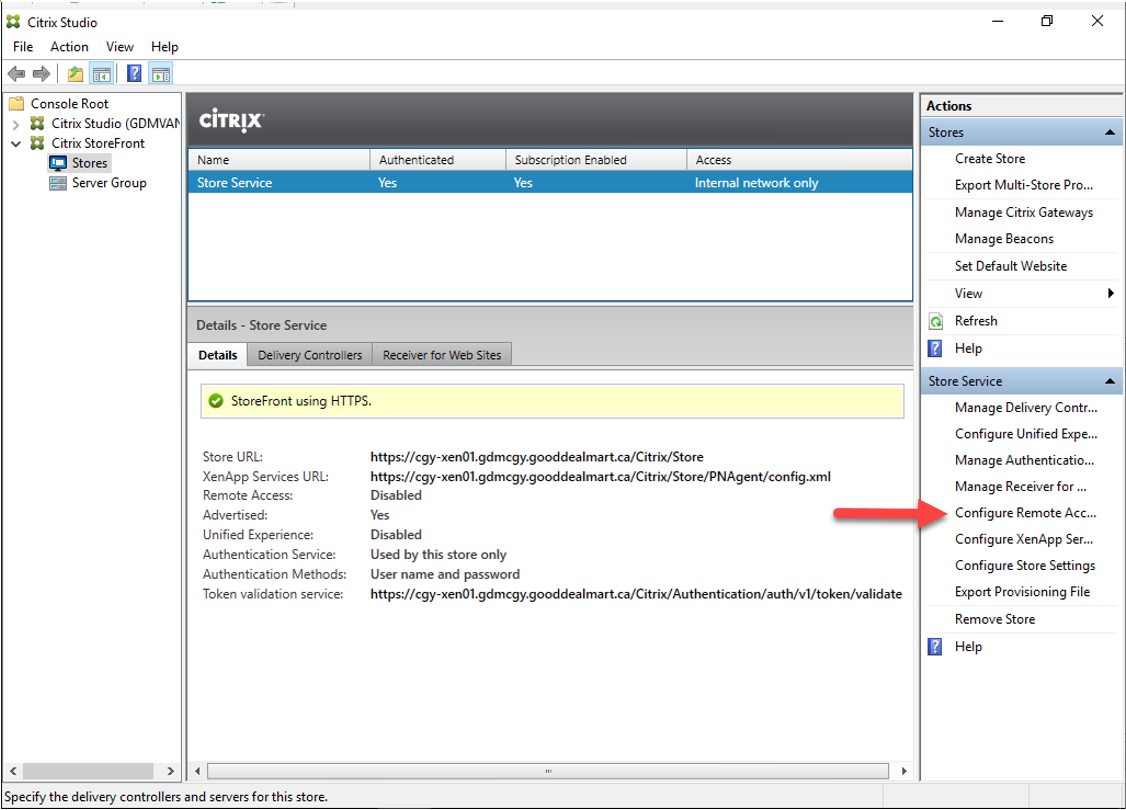
33.On the Store Service Actions page, click Configure Remote Access Settings.
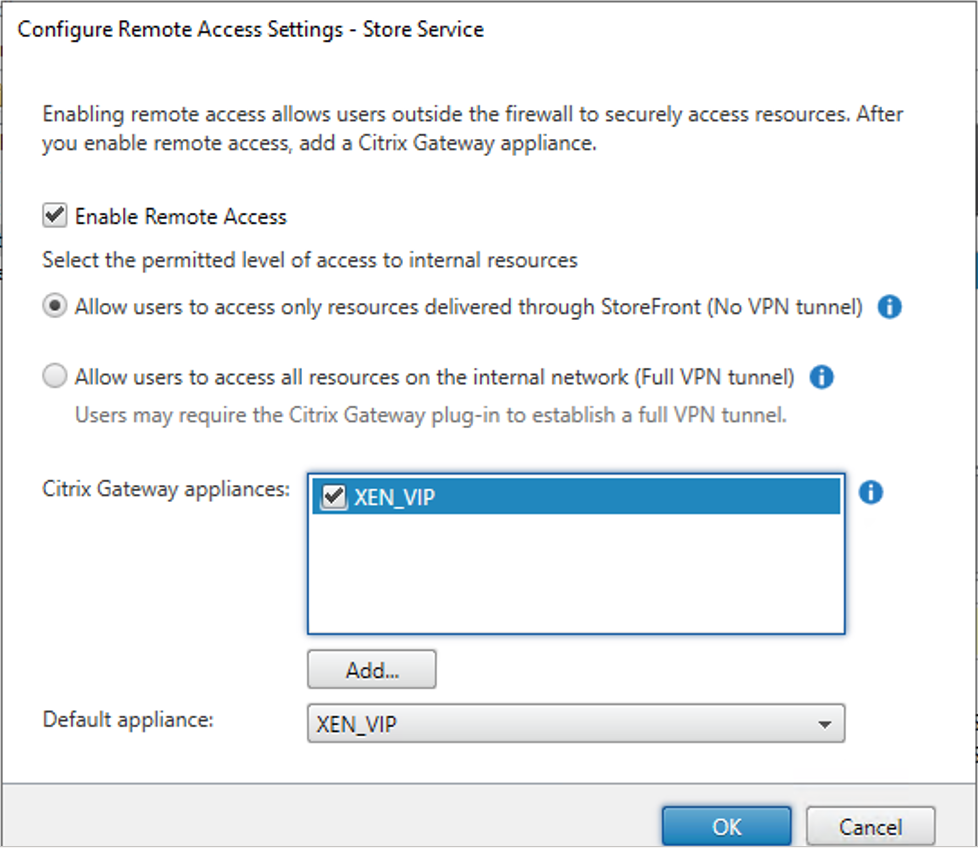
34.On the Configure Remote Access Settings – Store Service page, configure settings values as below, click OK.
- Select Enable Remote Access.
- Select Allow users to access only resource delivered through StoreFront (No VPN tunnel).
- Citrix Gateway appliances: Select XEN_VIP.
- Default appliance: Select XEN_VIP.
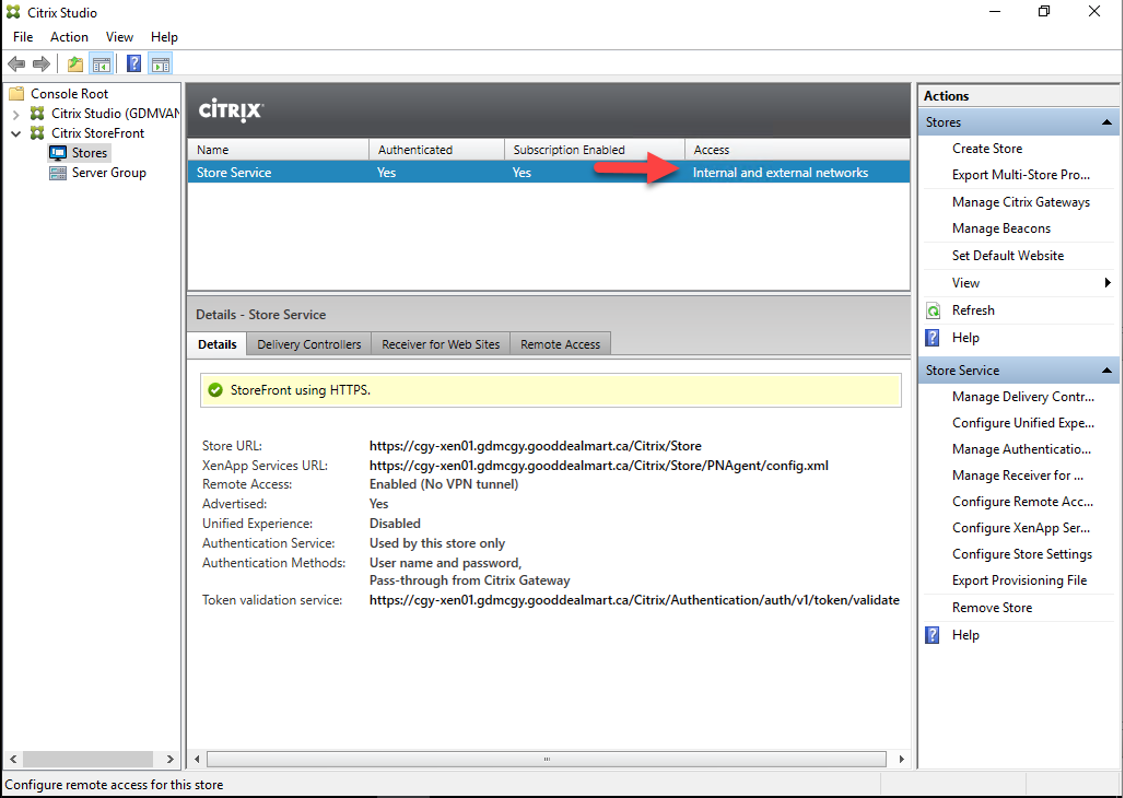
35.Verify the Store Service access for Internal and external networks.
Hope you enjoy this post.
Cary Sun
Twitter: @SifuSun
Web Site: carysun.com
Blog Site: checkyourlogs.net
Blog Site: gooddealmart.com
